
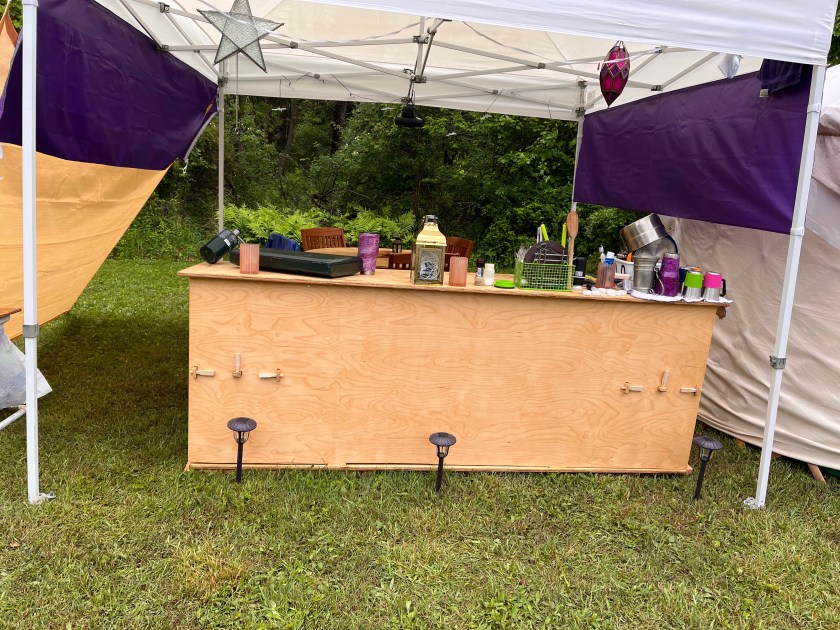
In spring 2022 I finally got around to building a new camp kitchen (but I didn’t have time to paint the boar). It’s amazing how much I’ve learned about working with plywood since I built the first one in 2015.
- I think the most critical lesson was to find ways to make your measurements consistent and repeatable.
- I only use one tape measure. Cheap tape measures aren’t accurate and I don’t want to pay for a calibrated one. If you use a single tape, you’ll have the same inaccuracies for all your measurements, as opposed to leaving one tape at the saw and a second at the work site.
- When making several identical parts, lay out all the markings before cutting them apart. I drew the tenons on the divider panels by drawing two parallel lines down the length of the uncut sheet.
- Use physical templates whenever you can. A scrap of plywood can be traced for the width of a mortice hole or the length of a flush tenon.
- The next most important thing was to find ways to lock all movement axis down, not just your primary movement.
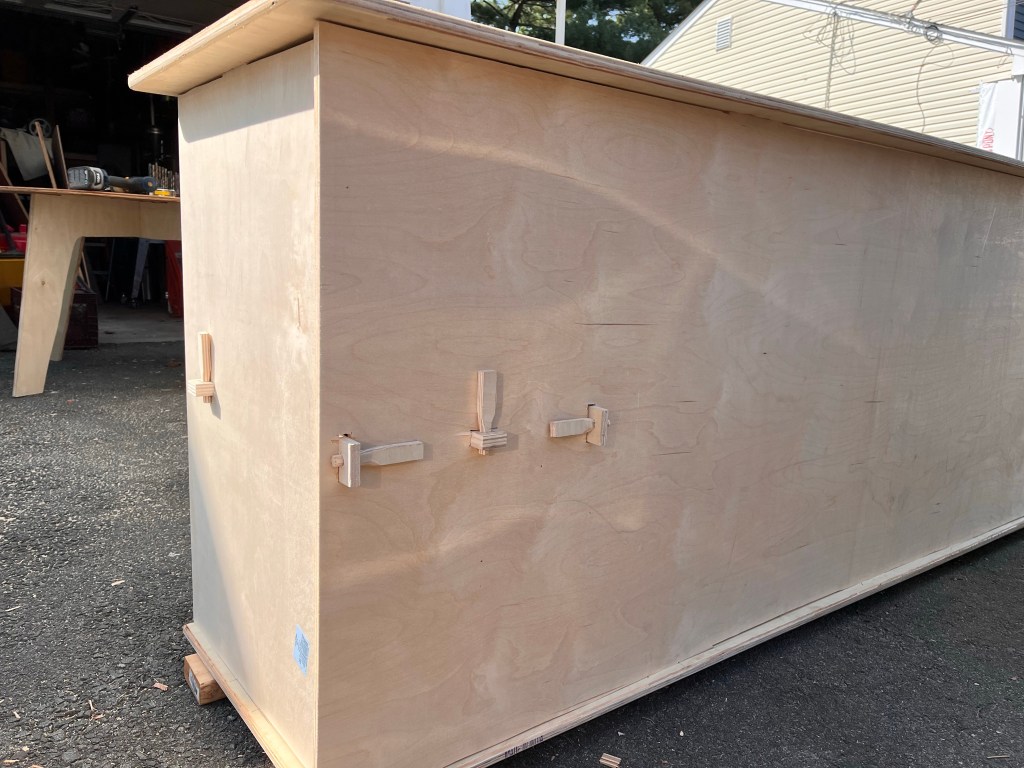
- Instead of metal pins (secure horizontally, but not vertically) the shelves are secured with through tenons (locked vertically) which are secured by wooden pins (locked horizontally).
- In this version, the dividers are secured to both the shelves and the front panel. In the first version, they were only secured to the shelves.
- The third lesson (which was taught by this project) is to always know which end is front, and which is back.
- The final lesson is to eliminate as many parts as possible.
- The first version had five shelves, two in each column and a center shelf for the cooler. I’ve replaced the bottom three shelves with a single bottom deck.
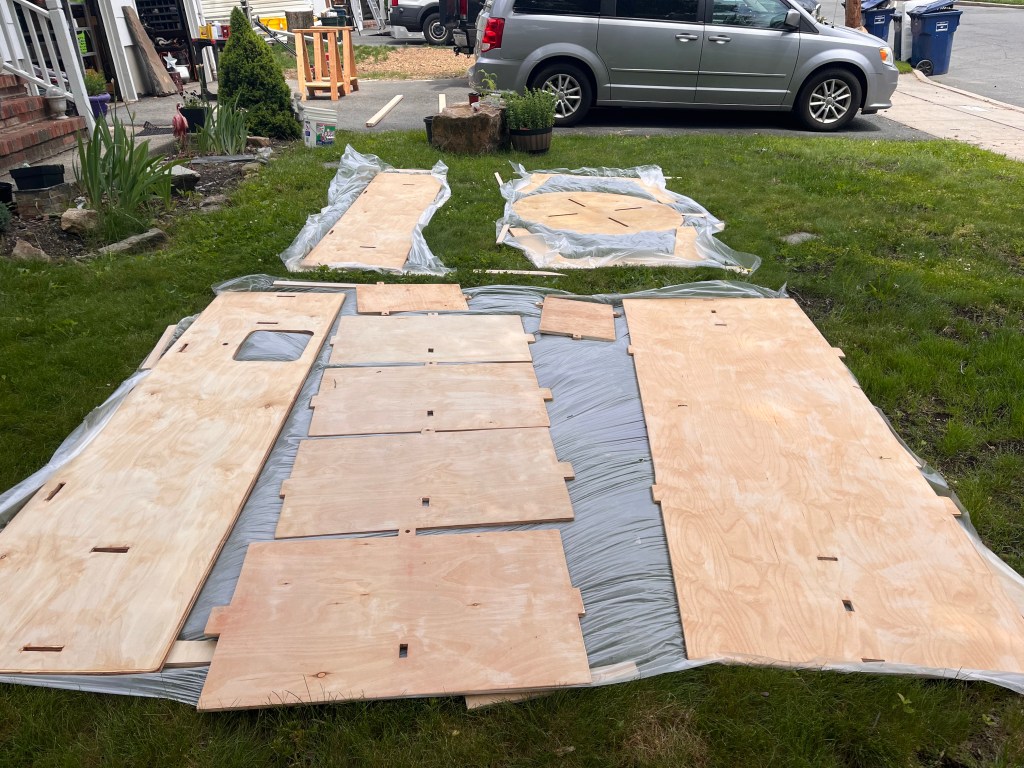
The kitchen is made of birch plywood. All horizontal panels are 3/4″, all verticals are 1/2″. The plans called for two sheets of 1/2″ and a full sheet of 3/4″, plus scrap from the table which I also built this spring.
Part 1 – The Top and Bottom Panels.
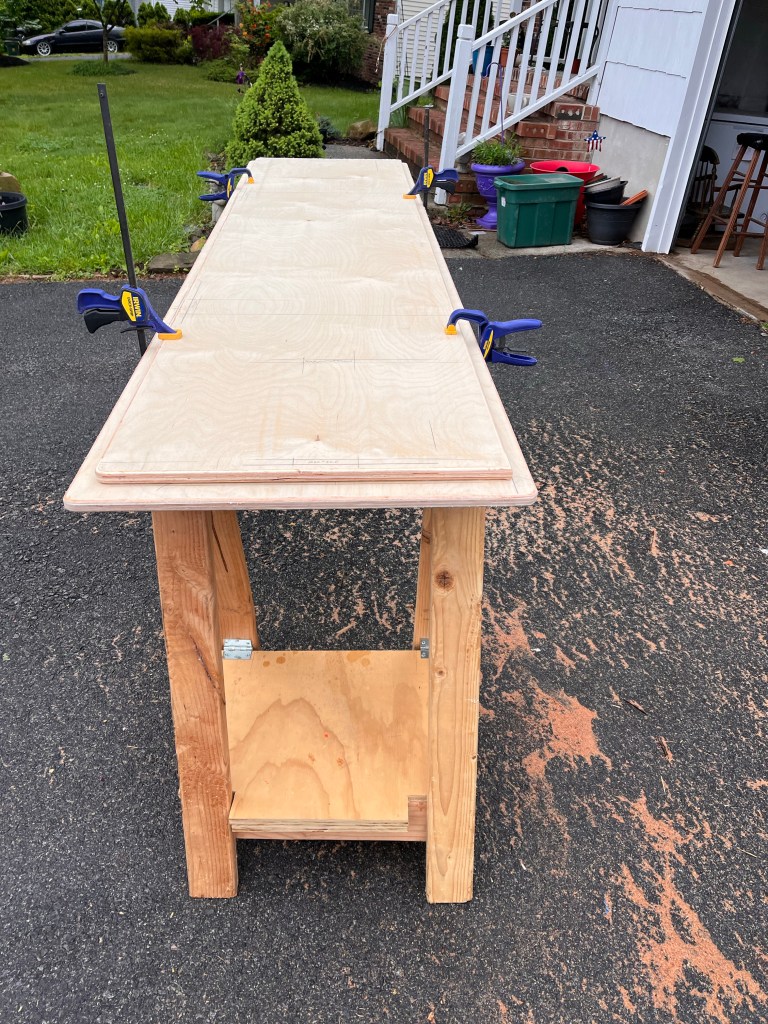
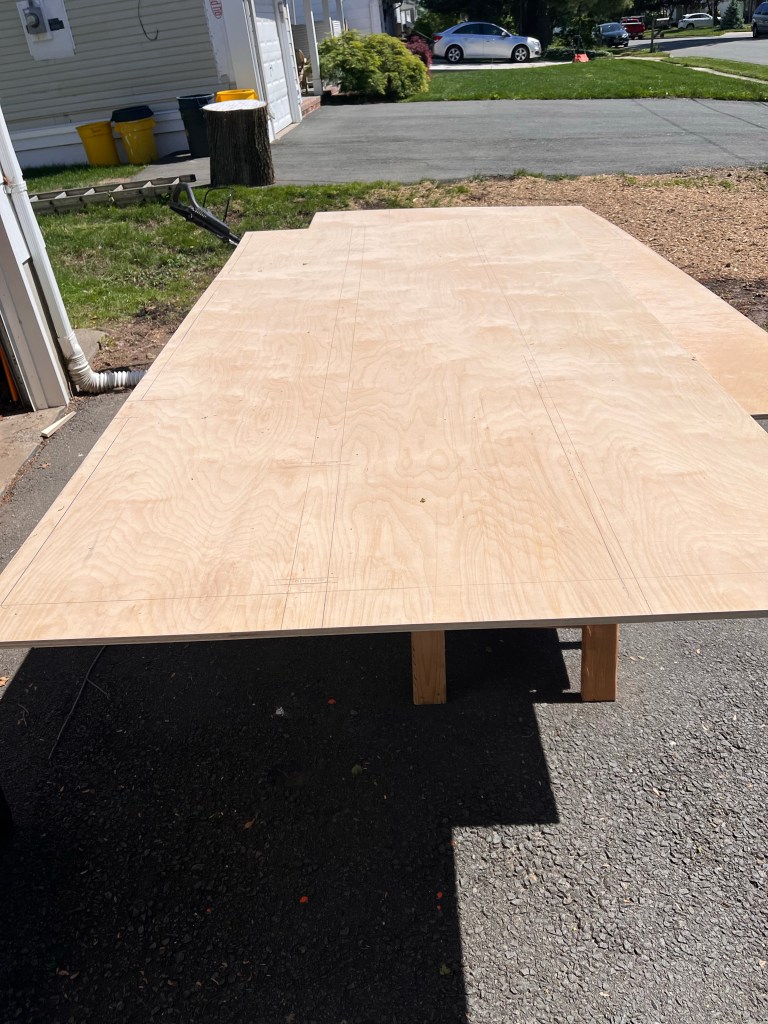
The larger panel is 96″ long and 24″ wide. The smaller panel is 93″ x 21″.
One of the biggest issues with Mk.1 was that each piece was unique because I eyeballed everything while assembling it. With Mk.2, I wanted to make the pieces uniform and consistent.
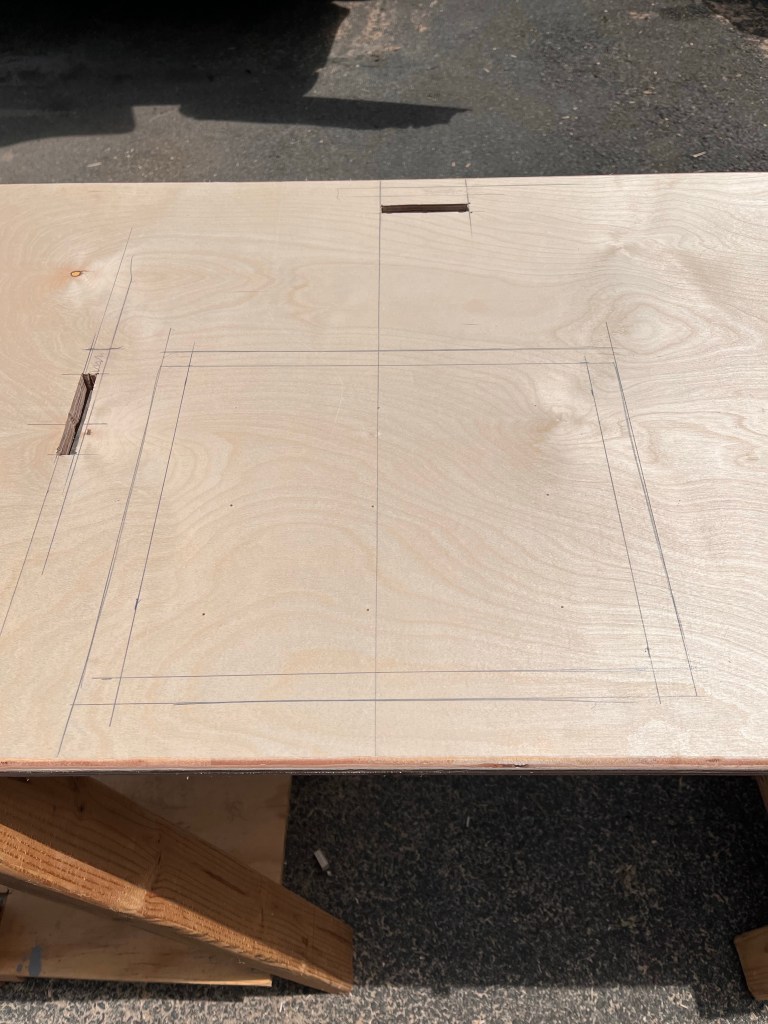
In the image above, I’ve marked out the mortise holes on the smaller panel. This panel will be the bottom deck of the kitchen. I’ve centered it on top of the top panel.

I don’t know what I was thinking with the bitty drill bit to mark the corners. Use a bit larger than your jigsaw blade.
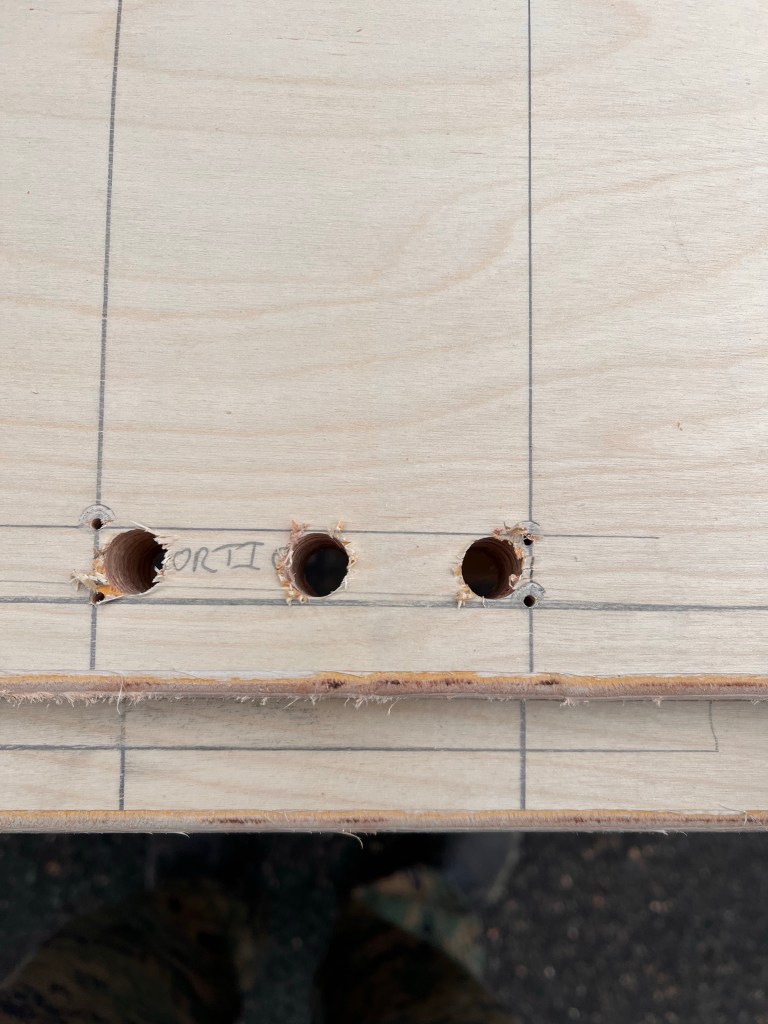
The front panel has two tenons through the top and two through the bottom. Each of the four divider panels has one each through top and bottom. I had to cut 6 mortise holes in the top and 6 in the bottom.
Part 2 – The Front Panel
In the above image, you can see how I ensured that the divider mortises through the front panel were all placed accurately. The double line places the mortise vertically. I used a scrap of 1/2″ plywood to mark the width of the mortise.
The front panel has flush tenons to the top and through tenons at the bottom panel, as well as mortises for each of the dividers and shelves.


Part 3 – The divider panels

And here is where things went sideways on me.
I laid out the four dividers on a single sheet of plywood. I drew two parallel lines to line up the tenons the same way I drew two parallel lines to ensure that the mortises lined up on the front panel. My mistake was not marking which end was the front and which was the back. I ended up cutting the tenons from the back end.
A quick run to the home store for four pieces of 2x4x 1/2” birch (because they don’t carry full sheets) and my problem was solved. I saved the mis-cut pieces for a future project.
Part 4 – Shelves and Pins
The two shelves were cut from the off cuts of the new table. They have tenons through the dividers and front panel.
The shelves hold the entire kitchen together with pinned through tenons. The tenons are 1 1/2” by 1 1/2” with a 1/2” hole for the pin.
With all my panels cut properly, it was time to make the pins. These are plywood scraps cut to a three inch length. I then used my pocketknife to whittle a round point in one end. These plywood pins will be replaced with sticks when they get lost or damaged.

Part 5 – Plumbing
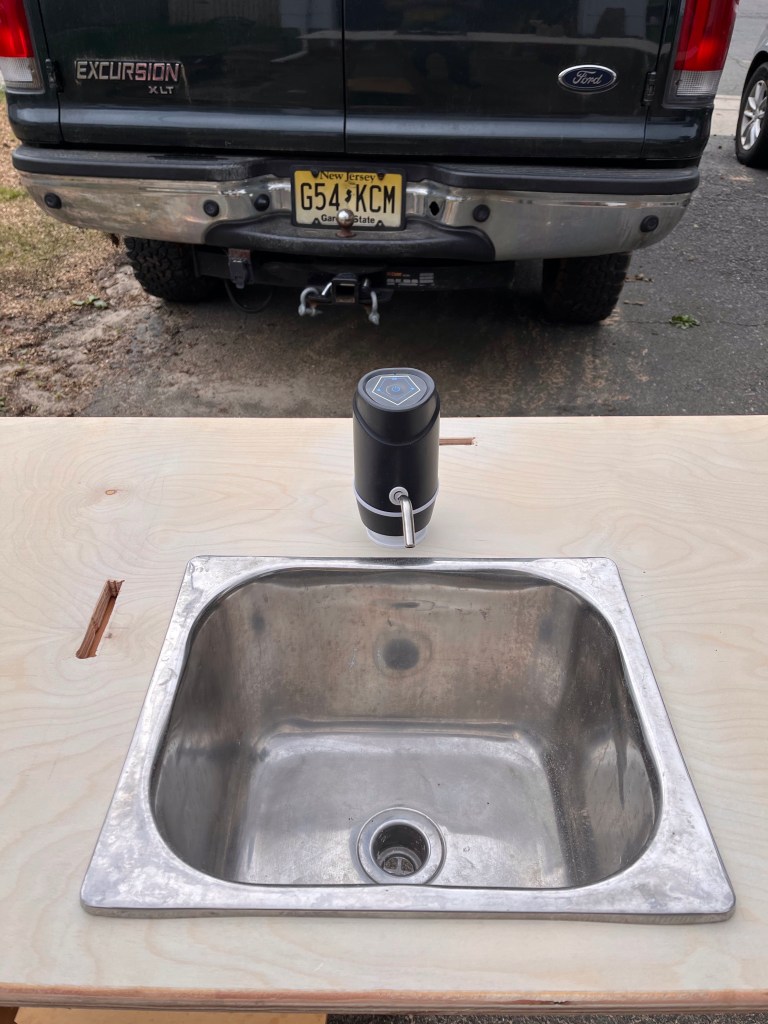
About two years after I built the original version, I acquired a tiny bar sink and dropped it into the counter. It drains into a five gallon bucket. Our water supply was a jug on the counter.
If you buy a new sink, the manufacturer includes a cutting template. If you find a used sink, you’re going to have to get creative.
- Place the sink upside down on the counter and mark the outside of the rim.
- Measure the depth of the rim on all four sides (because the sides are different from front & back).
- Mark your smaller hole.
- Use a hole saw to cut out the four corners.
- Use a jig or circular saw to cut the straight sides.

For Mk.2, I decided to improve on the water supply by adding a water pump. This little guy is designed to go onto a five gallon jug. The built in battery recharges by USB.
One of the issues with the first version of the kitchen was that it didn’t pack flat. I needed a way to secure the water pump on the counter that wouldn’t add thickness to the panel. So I drilled a hole.

Drop the nipple through the hole in the counter and the pump on top of the bushing. The pump pulls the water through a hose threaded through the nipple and to the bottom of the water jug.
Part 6 – Applying Finish
I finished all six sides of all five panels with three coats of Tung Oil finish. I wanted to use the Tung oil because I’m going to apply decorative paint over the winter and I can use oil paint over the Tung oil. I probably won’t use Tung oil very much in the future because it requires 24 hours of drying time between coats and it seems to coat the surface of the wood as opposed to soaking in. I’ll probably go back to boiled linseed oil (soaks in nicely, 20 minute drying time, oxidizes to a warm orange tint) after testing to see if I can paint over it.


No Project Is Ever Finished
I still need to install the paper towel hanger and decorate the kitchen.
I really should replace the milk crates with wooden boxes, but I’m not certain that will ever happen.
Legal jibber-jabber
- As an Amazon Affiliate, I may earn commission if you purchase something linked from this page.
- Product reviews – unless stated otherwise, I have purchased all reviewed products with my own money.
- “Manufacturers claims” are exactly that. Their claims. If my text says “manufacturer claims” it means I haven’t checked it and I probably don’t have a way to check it. Hydrostatic ratings, R-values, Temperature ratings, etc.
- Follow these instructions at your own risk. I’m not a professional anything. I’m just some random human you encountered on the internet. I may or may not have any idea what I’m doing. I certainly have no idea what you’re doing. I accept no liability for injury, property damage or any other direct or indirect damages you may incur from anything on this page or any other pages I may or may not have authored.
- Copyright Reserved Creative Commons – Attribution, Non-Commercial, Share Alike . If I’ve inspired you, link back to this page. Don’t steal my text or photos. Feel free to modify my designs in any way you see fit. Don’t try to make yourself money from my ideas.
- Comments will be moderated. Those that add to the discussion will be allowed. Those that add nothing will be deleted. If you don’t agree with my decisions, get your own website.
- DON’T PANIC
