
Now that the third (and hopefully final) table has been made, I wanted to take a look back at the changes between versions. All three designs were built with a single 4′ x 8′ sheet of plywood.
Mark 1
The first one came from a post on Tear Drops and Tiny Trailers. I can’t find the original post, so I’ve uploaded the measured drawing here.
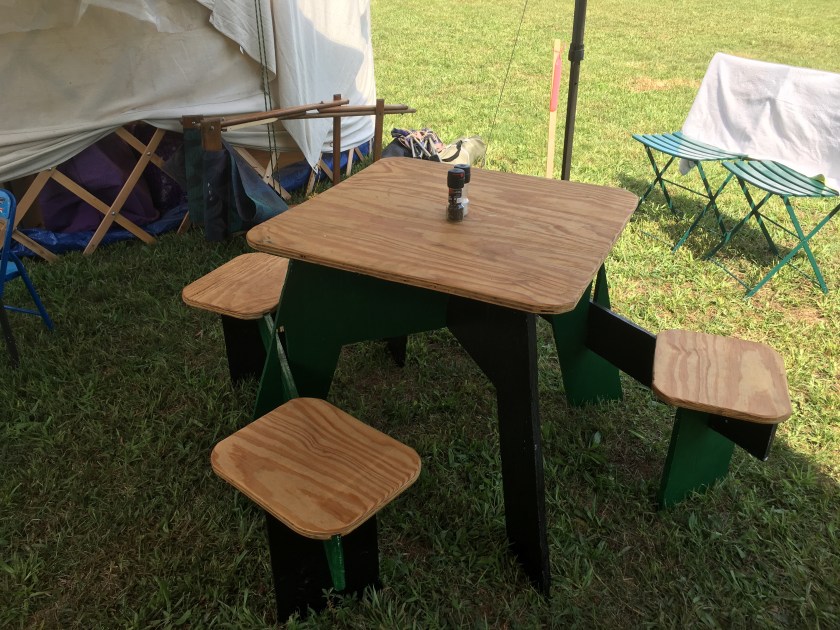
I thought the first version was okay, but the wife was not a fan. I’m sure a lot of the shortcomings of this one had more to do with my skills than the design.
- I decided to route the undersides of the seats and table top instead of fixing them with dowels. I didn’t have confidence that I would be able to drill the holes perfectly perpendicular to the edge of the plywood.
- I pushed the jig saw instead of letting it cut, so the blade curved. My joints ended up very sloppy when everything was done.
- My long-legged wife didn’t have enough room under the table for her legs and didn’t like the fact that the seats were fixed in place.
- My toddlers couldn’t sit still in the center of the seats, so the seats kept popping off and dumping babies in the grass. (three of the four of us thought it was hilarious)
- The true weakness of this design is that it has 8 points of contact with the ground. The table was great when it was set on my concrete driveway at home. When we tried to use it on a grassy field, it was less satisfactory.
- The table top is 30″ square. It is almost, but not quite big enough for four people to eat a simple meal. Its better suited for drinks and a card game.
- The table top is 28″ off the ground. A standard dining room table top is 30″ from the floor. It doesn’t seem like much, but the difference is noticeable.
- The seats are less than 12″ square. Skinny bottoms only.
The second time we took this table out, we left the seats & seat support boards at home and used the bistro chairs. By the end of this trip, I had the second version designed in my head.
Mark 2
For Mk.2, I deleted the seats, increased the size of the table top and lengthened the legs.
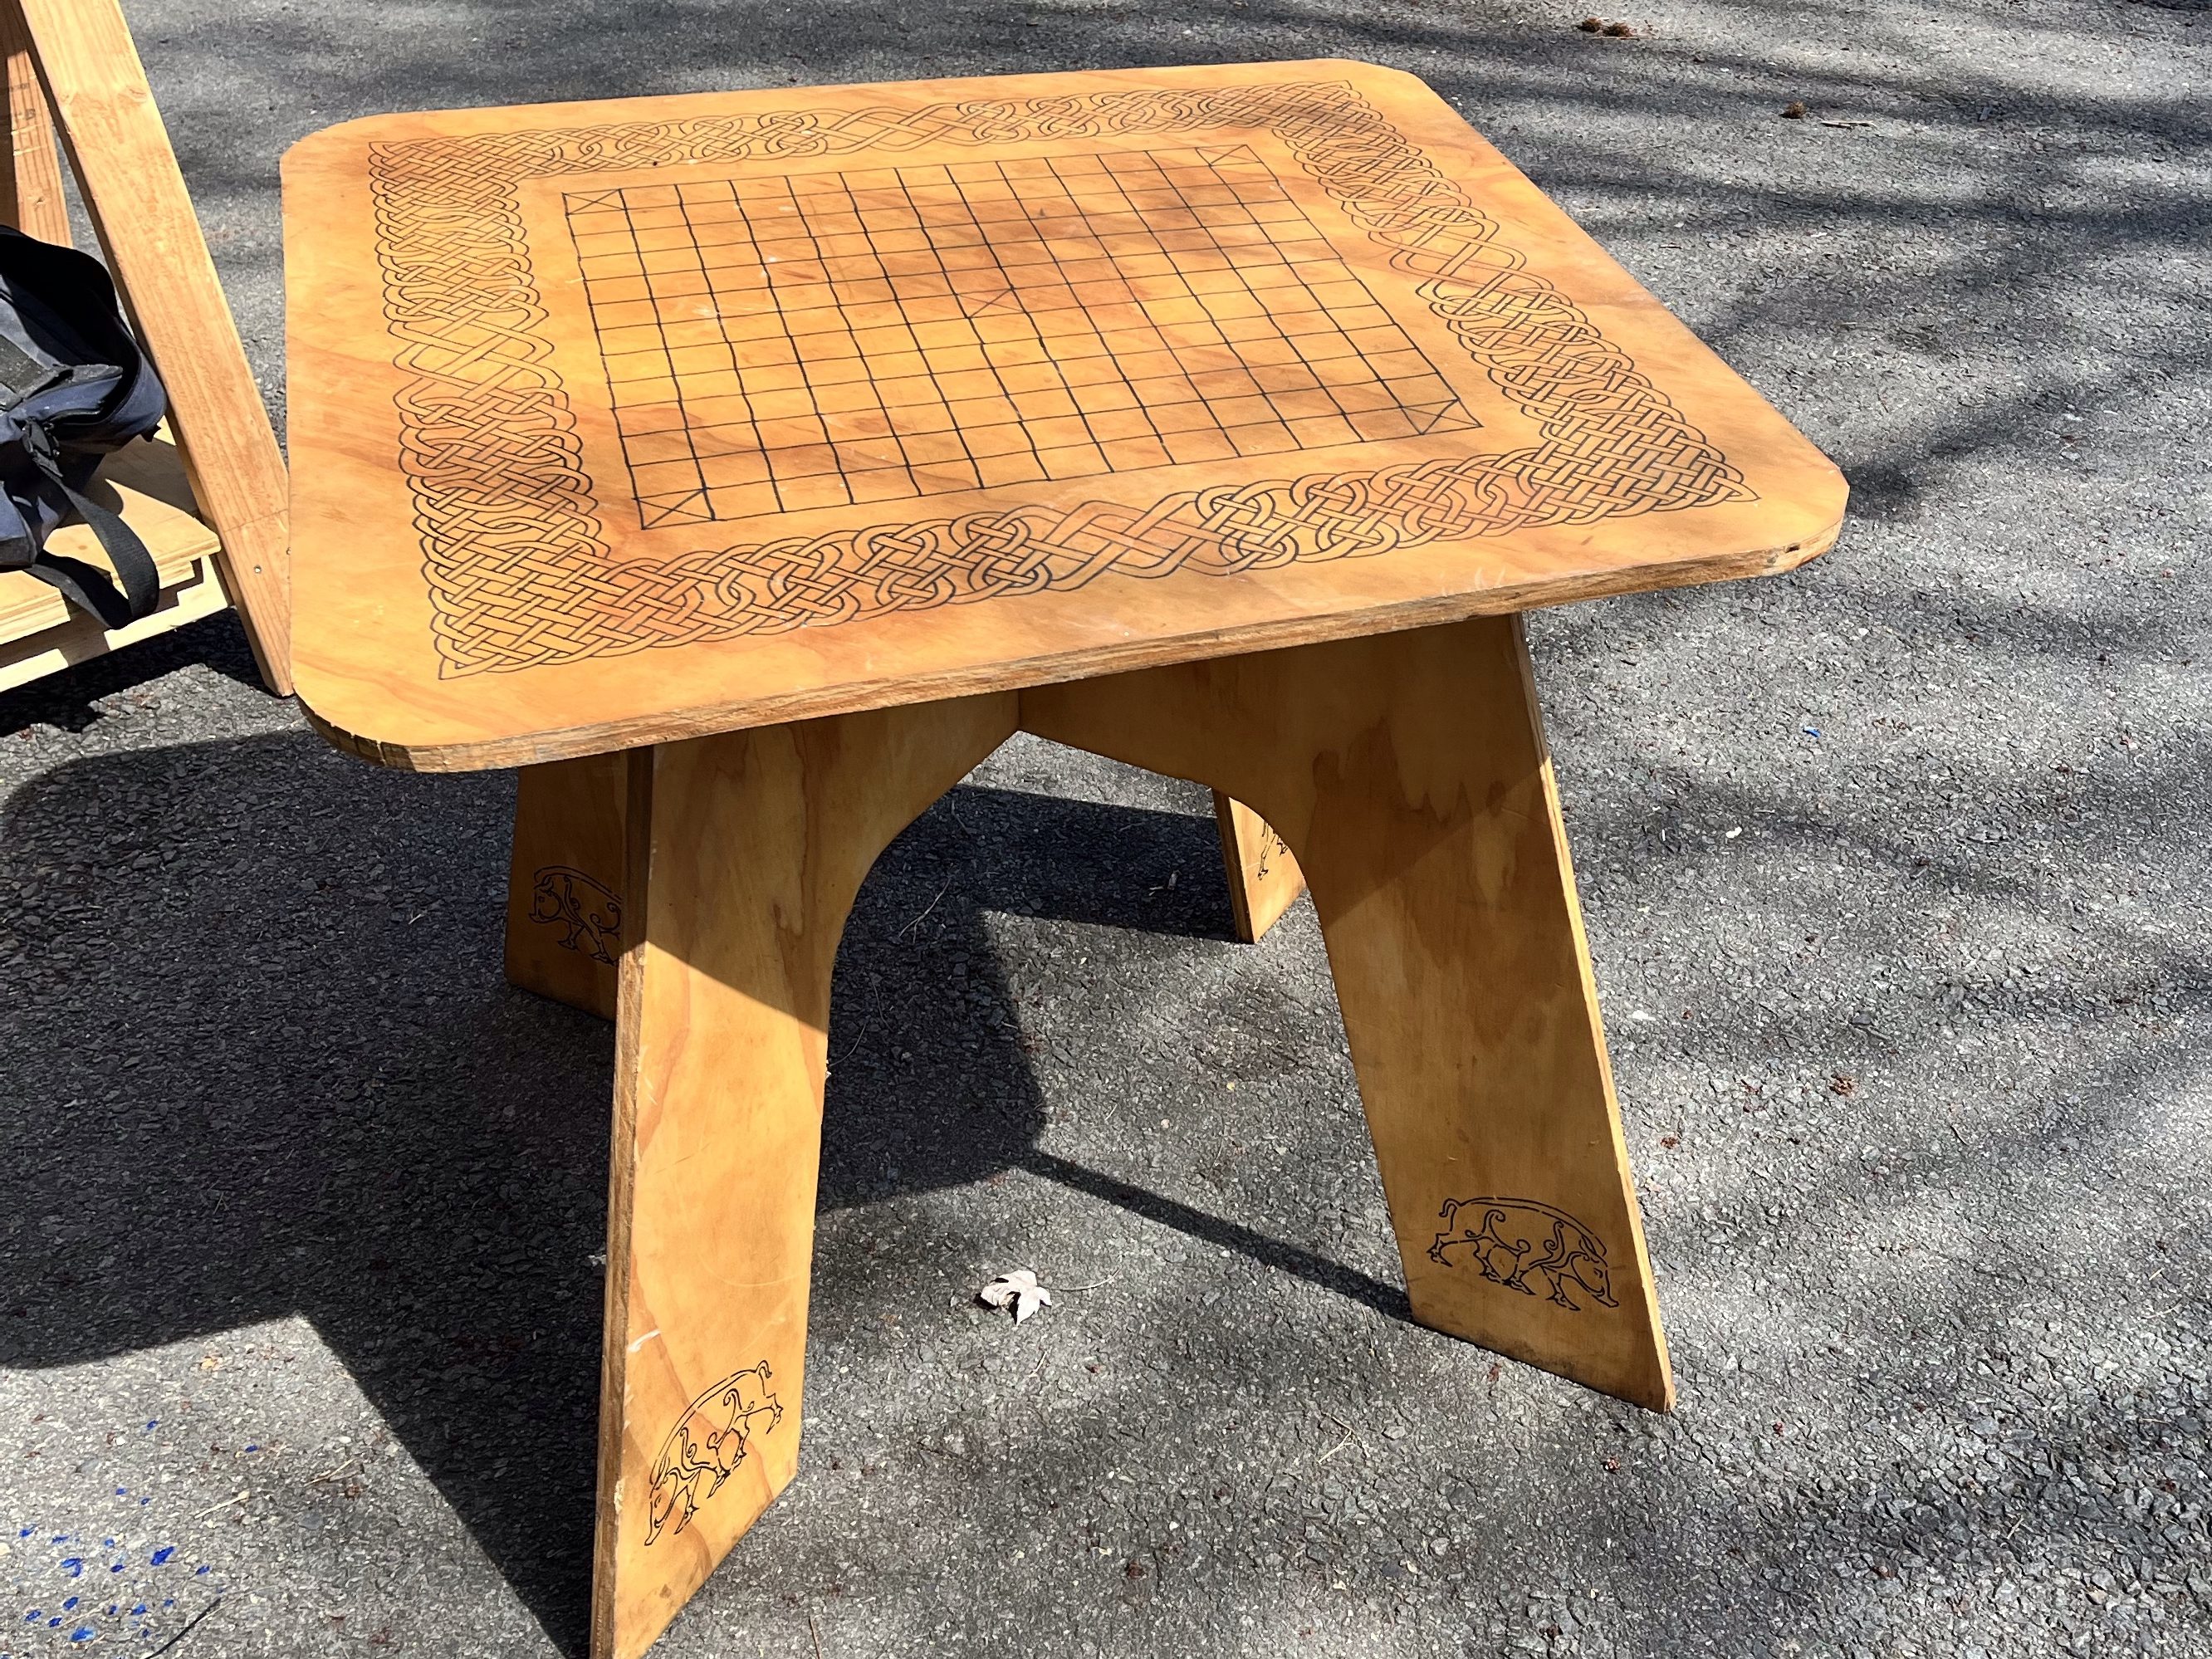
I also decided to decorate the table. Here are the directions for the Celtic Knotwork. The grid in the center is for a Norse game called Hnefatafl. The boars on the legs are a stencil that my wife cut out on her Cricut.
- The table top is 34″ square (48″ diagonal). This small difference yields an additional 256 square inches of table.
- The table legs are 30″tall. I drew the top on the center of the sheet of plywood and then laid the legs out around the top.
- The idea of a game board built into the table is far better than the reality. To play the game, the table needs to be totally cleared, which means there is no place for snacks, drinks, or sources of light.
- Again, I routed slots in the underside of the table for the legs to click into. There are two problems with this approach.
- You have to kneel in the mud to assemble the table.
- Only 3/8″ rabbet isn’t really enough to secure the legs to the table.
- When your table is square, there’s no place for a fifth person to have dinner, so your mom can’t come camping with you. (depending on your relationship with your mother, this could be a pro or a con) {Just kidding, mom!}
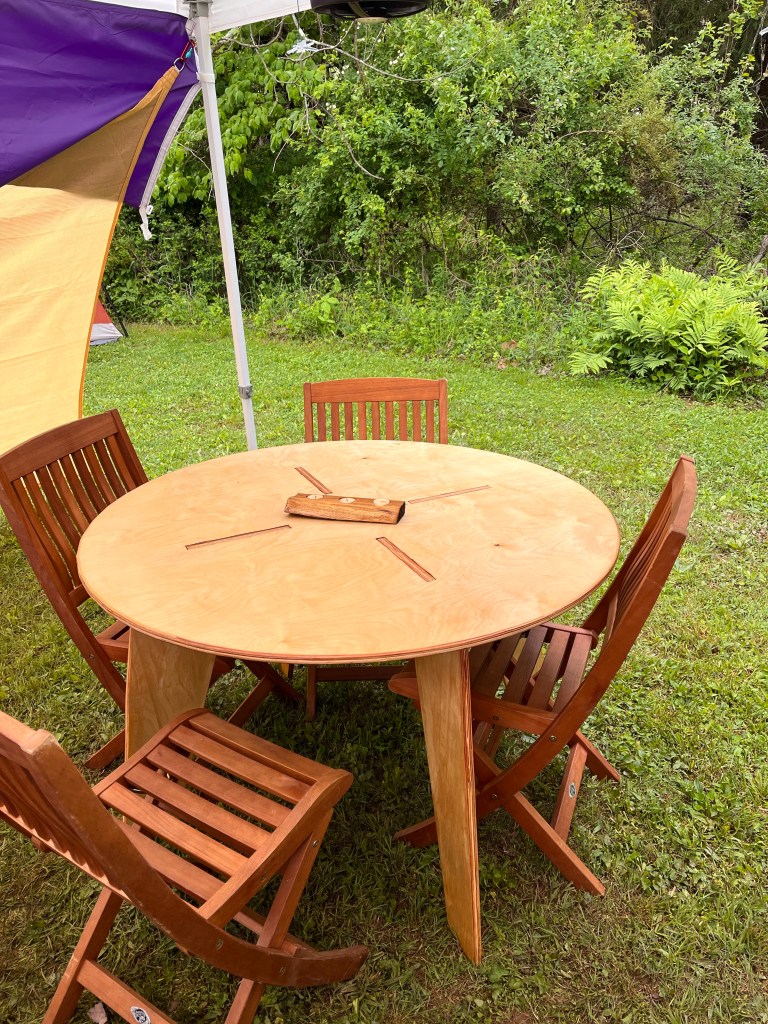
Mark 3
For Mk.3, the top is round and I used mortice & flush tenons to connect the top to the legs
I hope I’m done.
- 48″ diameter round top. Roomy for five, cozy for six. But if you don’t want to deal with the table legs, four is the right number.
- The mortice and tenon joinery is a little bit more challenging to cut, but more secure and assembly can be done standing up and looking down through the holes.
- If anything, this table top is too big, as it can’t stand on edge in the back of the Excursion.
Legal jibber-jabber
- As an Amazon Affiliate, I may earn commission if you purchase something linked from this page.
- Product reviews – unless stated otherwise, I have purchased all reviewed products with my own money.
- “Manufacturers claims” are exactly that. Their claims. If my text says “manufacturer claims” it means I haven’t checked it and I probably don’t have a way to check it. Hydrostatic ratings, R-values, Temperature ratings, etc.
- Follow these instructions at your own risk. I’m not a professional anything. I’m just some random human you encountered on the internet. I may or may not have any idea what I’m doing. I certainly have no idea what you’re doing. I accept no liability for injury, property damage or any other direct or indirect damages you may incur from anything on this page or any other pages I may or may not have authored.
- Copyright Reserved Creative Commons – Attribution, Non-Commercial, Share Alike . If I’ve inspired you, link back to this page. Don’t steal my text or photos. Feel free to modify my designs in any way you see fit. Don’t try to make yourself money from my ideas.
- Comments will be moderated. Those that add to the discussion will be allowed. Those that add nothing will be deleted. If you don’t agree with my decisions, get your own website.
- DON’T PANIC
