
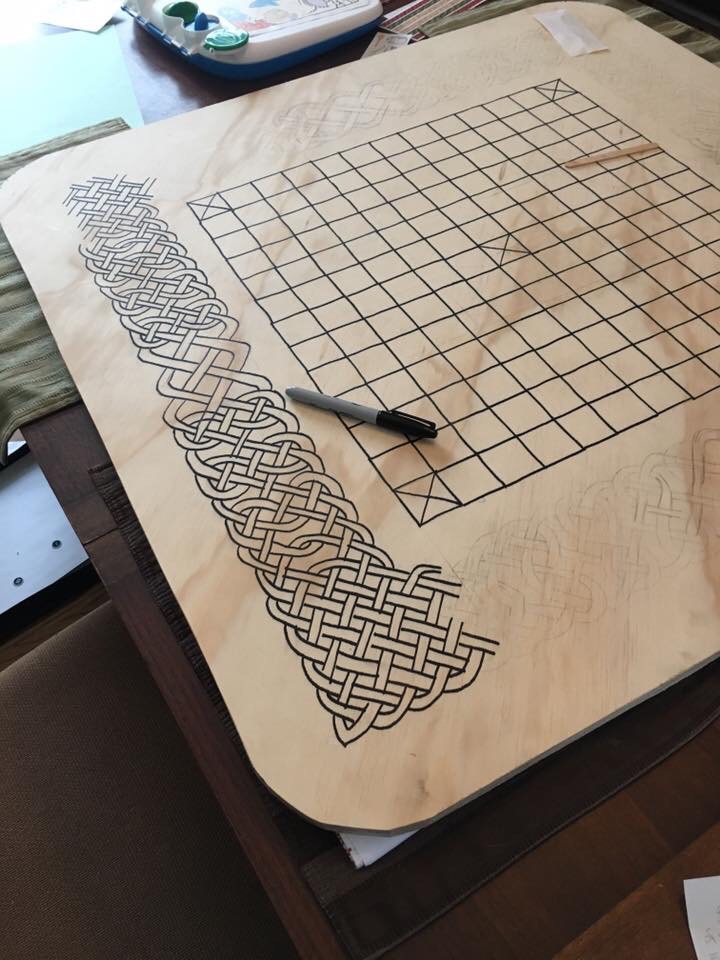
When I was designing Table Mk. 2, I decided that I wanted to decorate the top with some Celtic knotwork. Only one problem with that plan, I had no idea how to do so and I have very limited zero artistic talent.
A bit of internet searching led me to a tutorial at ClanBadge.com. They only have (according to their own text) this tutorial to show you how much easier it would be if you purchase their font. Full disclosure, I did purchase the font and plan on using it to decorate the new roof for the yurt.
Having done it both ways, the font is much faster, but I think I prefer the hand drawn method because it’s less perfect.
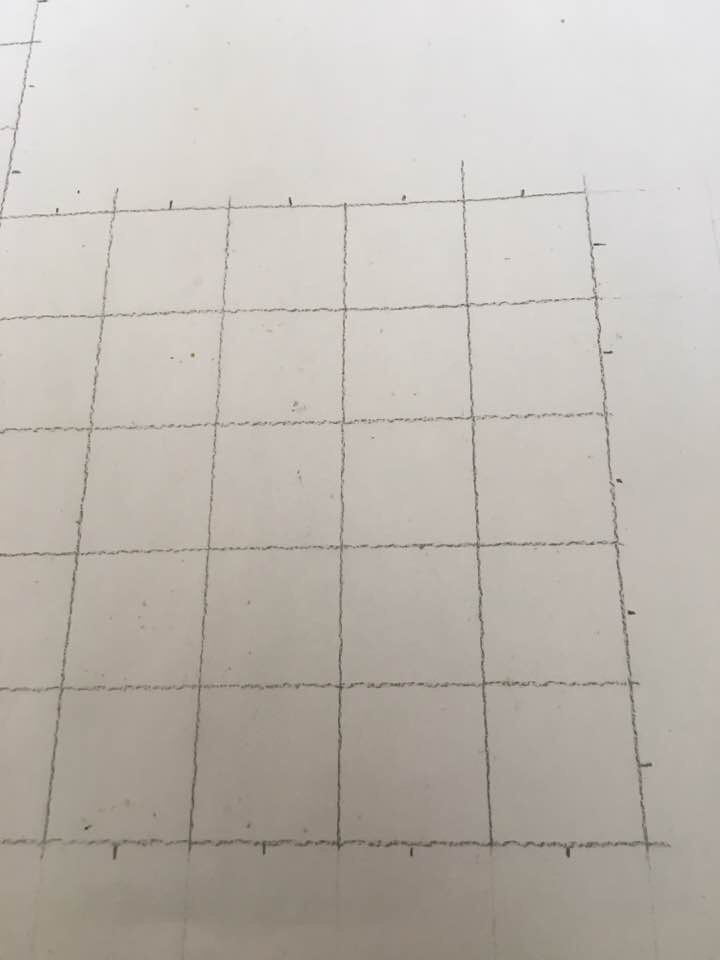
1) Draw a square grid. I used one inch squares. Mark the mid-points around the perimeter.
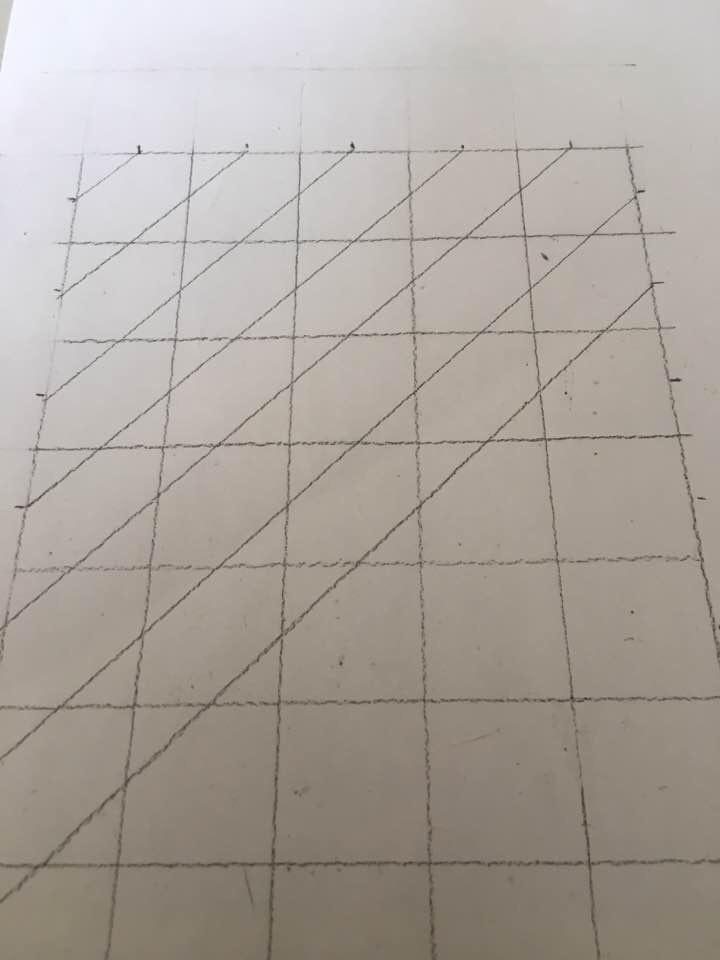
2) Draw diagonals connecting the midpoints.


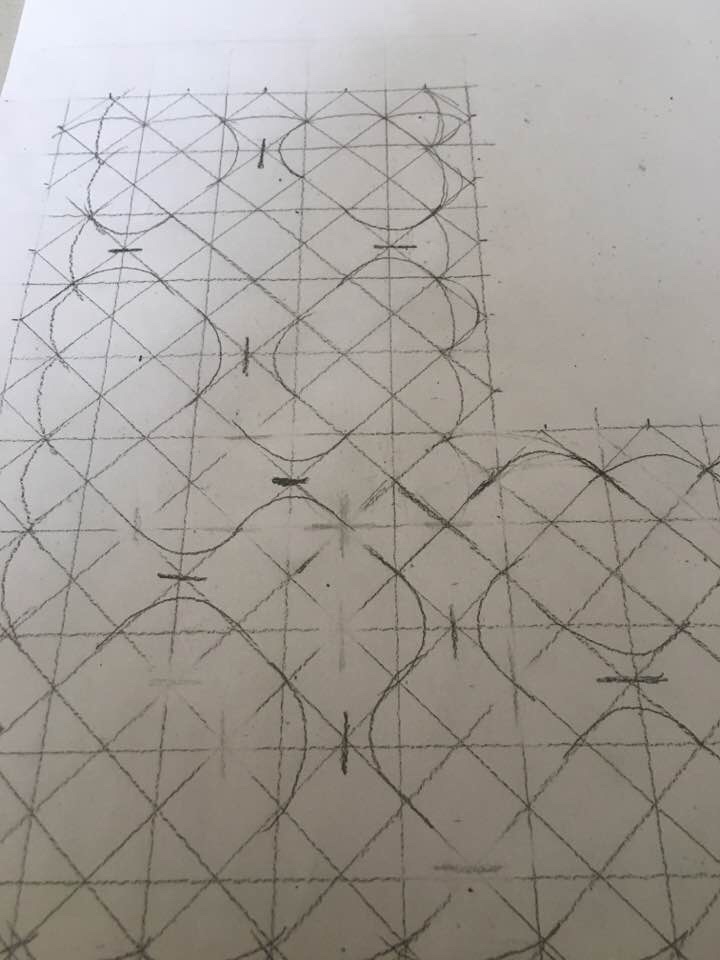
3) This is where you need to be artistic. The breaks in the knotwork are what make the design interesting. Break up your diagonal grid in a few (or several) places. Symmetry is your friend.
4) Everywhere that a diagonal ends, draw a curve.

5) Erase all the horizontal and vertical lines. Erase all the diagonal lines that extend past the curves you drew in the previous step.
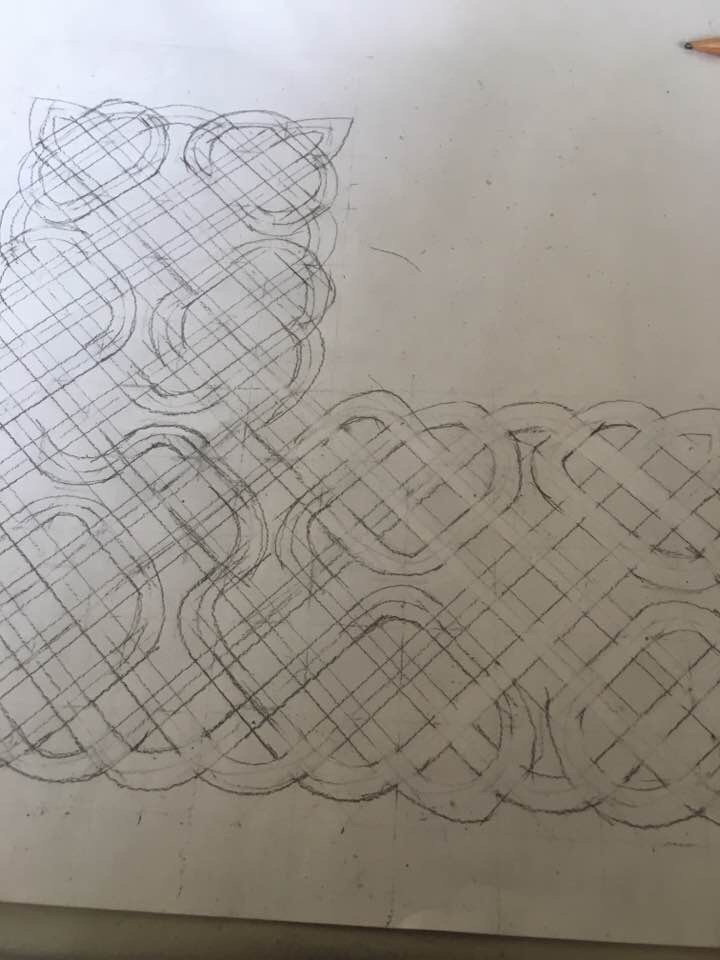
6) Draw parallel lines on each side of your original line. You are trying to add thickness to the original line.
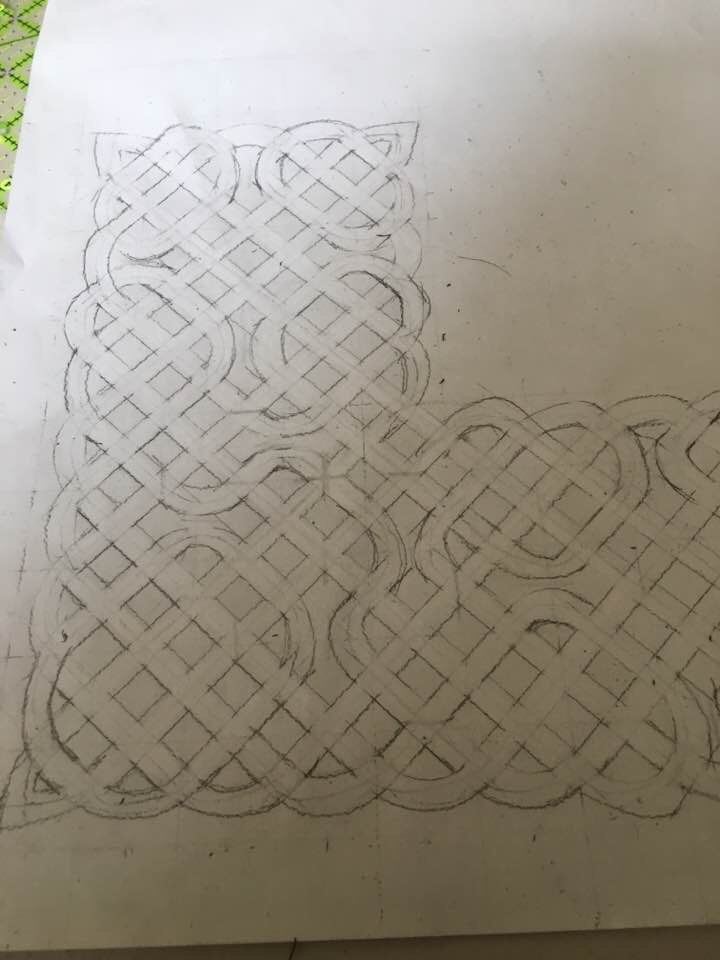
7) Erase the middle line. It’s sort of starting to look like something.
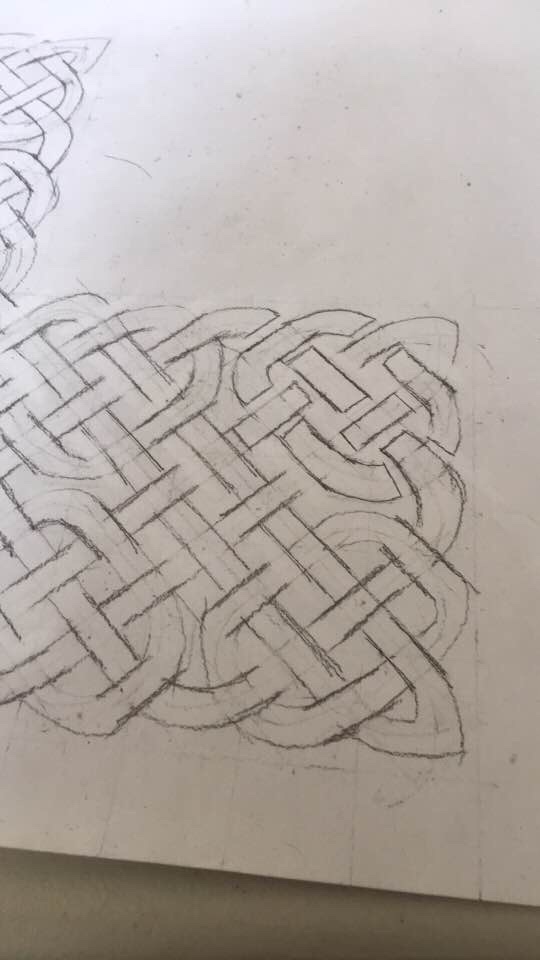
8) Add the over and unders. Start anywhere. Pick any line and follow it. Another big eraser step.
9) If your project is going to be on the paper you’ve been working on, you are now ready for ink & color in any way you see fit. I had to figure out how to transfer this image to the plywood of my new table top. as I couldn’t find any 24″ x 24″ pieces of carbon paper, I penciled in the entire back side of the project. Basically I made my own carbon paper. I then taped the design to the tabletop with the knot work facing up. Trace the knot work with the pencil. I had to free-hand the connections between the corners.
Legal jibber-jabber
- As an Amazon Affiliate, I may earn commission if you purchase something linked from this page.
- Product reviews – unless stated otherwise, I have purchased all reviewed products with my own money.
- “Manufacturers claims” are exactly that. Their claims. If my text says “manufacturer claims” it means I haven’t checked it and I probably don’t have a way to check it. Hydrostatic ratings, R-values, Temperature ratings, etc.
- Follow these instructions at your own risk. I’m not a professional anything. I’m just some random human you encountered on the internet. I may or may not have any idea what I’m doing. I certainly have no idea what you’re doing. I accept no liability for injury, property damage or any other direct or indirect damages you may incur from anything on this page or any other pages I may or may not have authored.
- Copyright Reserved Creative Commons – Attribution, Non-Commercial, Share Alike . If I’ve inspired you, link back to this page. Don’t steal my text or photos. Feel free to modify my designs in any way you see fit. Don’t try to make yourself money from my ideas.
- Comments will be moderated. Those that add to the discussion will be allowed. Those that add nothing will be deleted. If you don’t agree with my decisions, get your own website.
- DON’T PANIC
