
- Small straight blade screwdriver
- Ratchet handle
- Socket extension
- 7mm, 10mm, 11mm, and T27 sockets.
- Hook
- Needle nose pliers
- All these plastics are 15-20 years old. Be gentle.
- Assuming you’re doing all four doors, start with the rears (easiest). Driver’s door is the hardest because of the extra wire harnesses.
- Raise window fully
- Front doors only – remove the inside sail panel (panel opposite side mirrors) by pulling out & to the rear.
- Using flat screwdriver pry off reflector/lens at rear bottom corner of door
- Remove 7mm bolt
- Pry up switch panel at front of armrest
- Unplug wiring harness(es) from switch panel
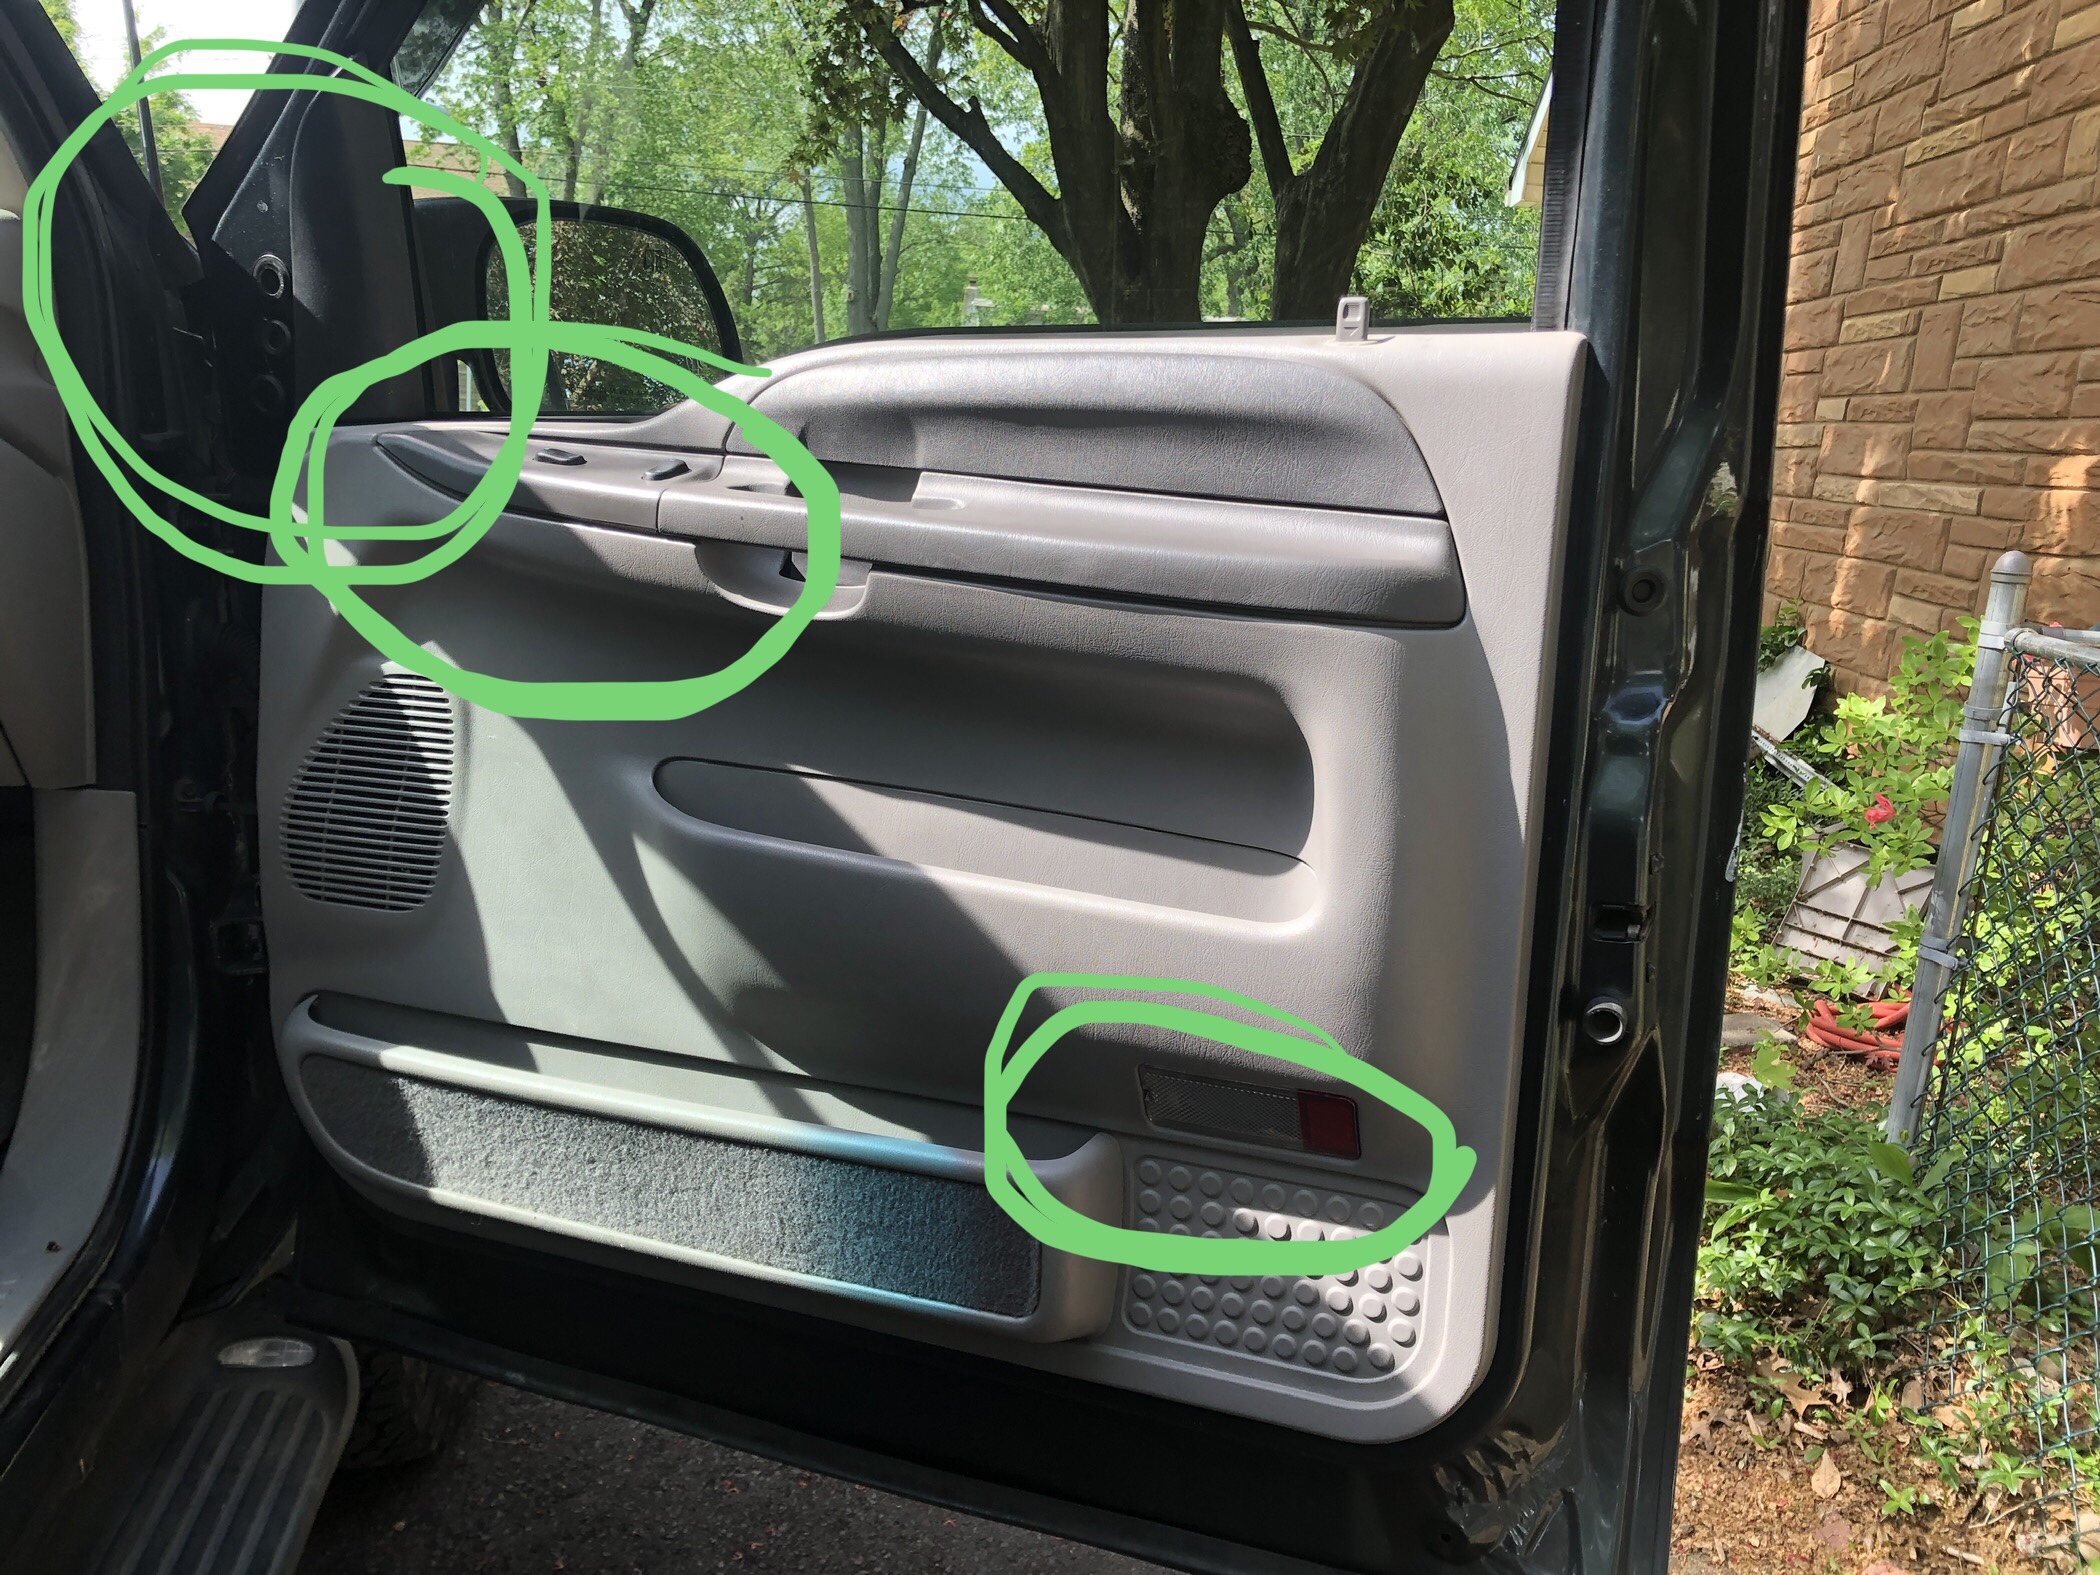
- Remove 7mm bolt
- Lift door skin straight up. ****Front doors only – a quarter-turn on the courtesy light and push it into door cavity.
- Put door skin to side. (It fits nicely between first & second rows.)
- Peel back plastic liner.
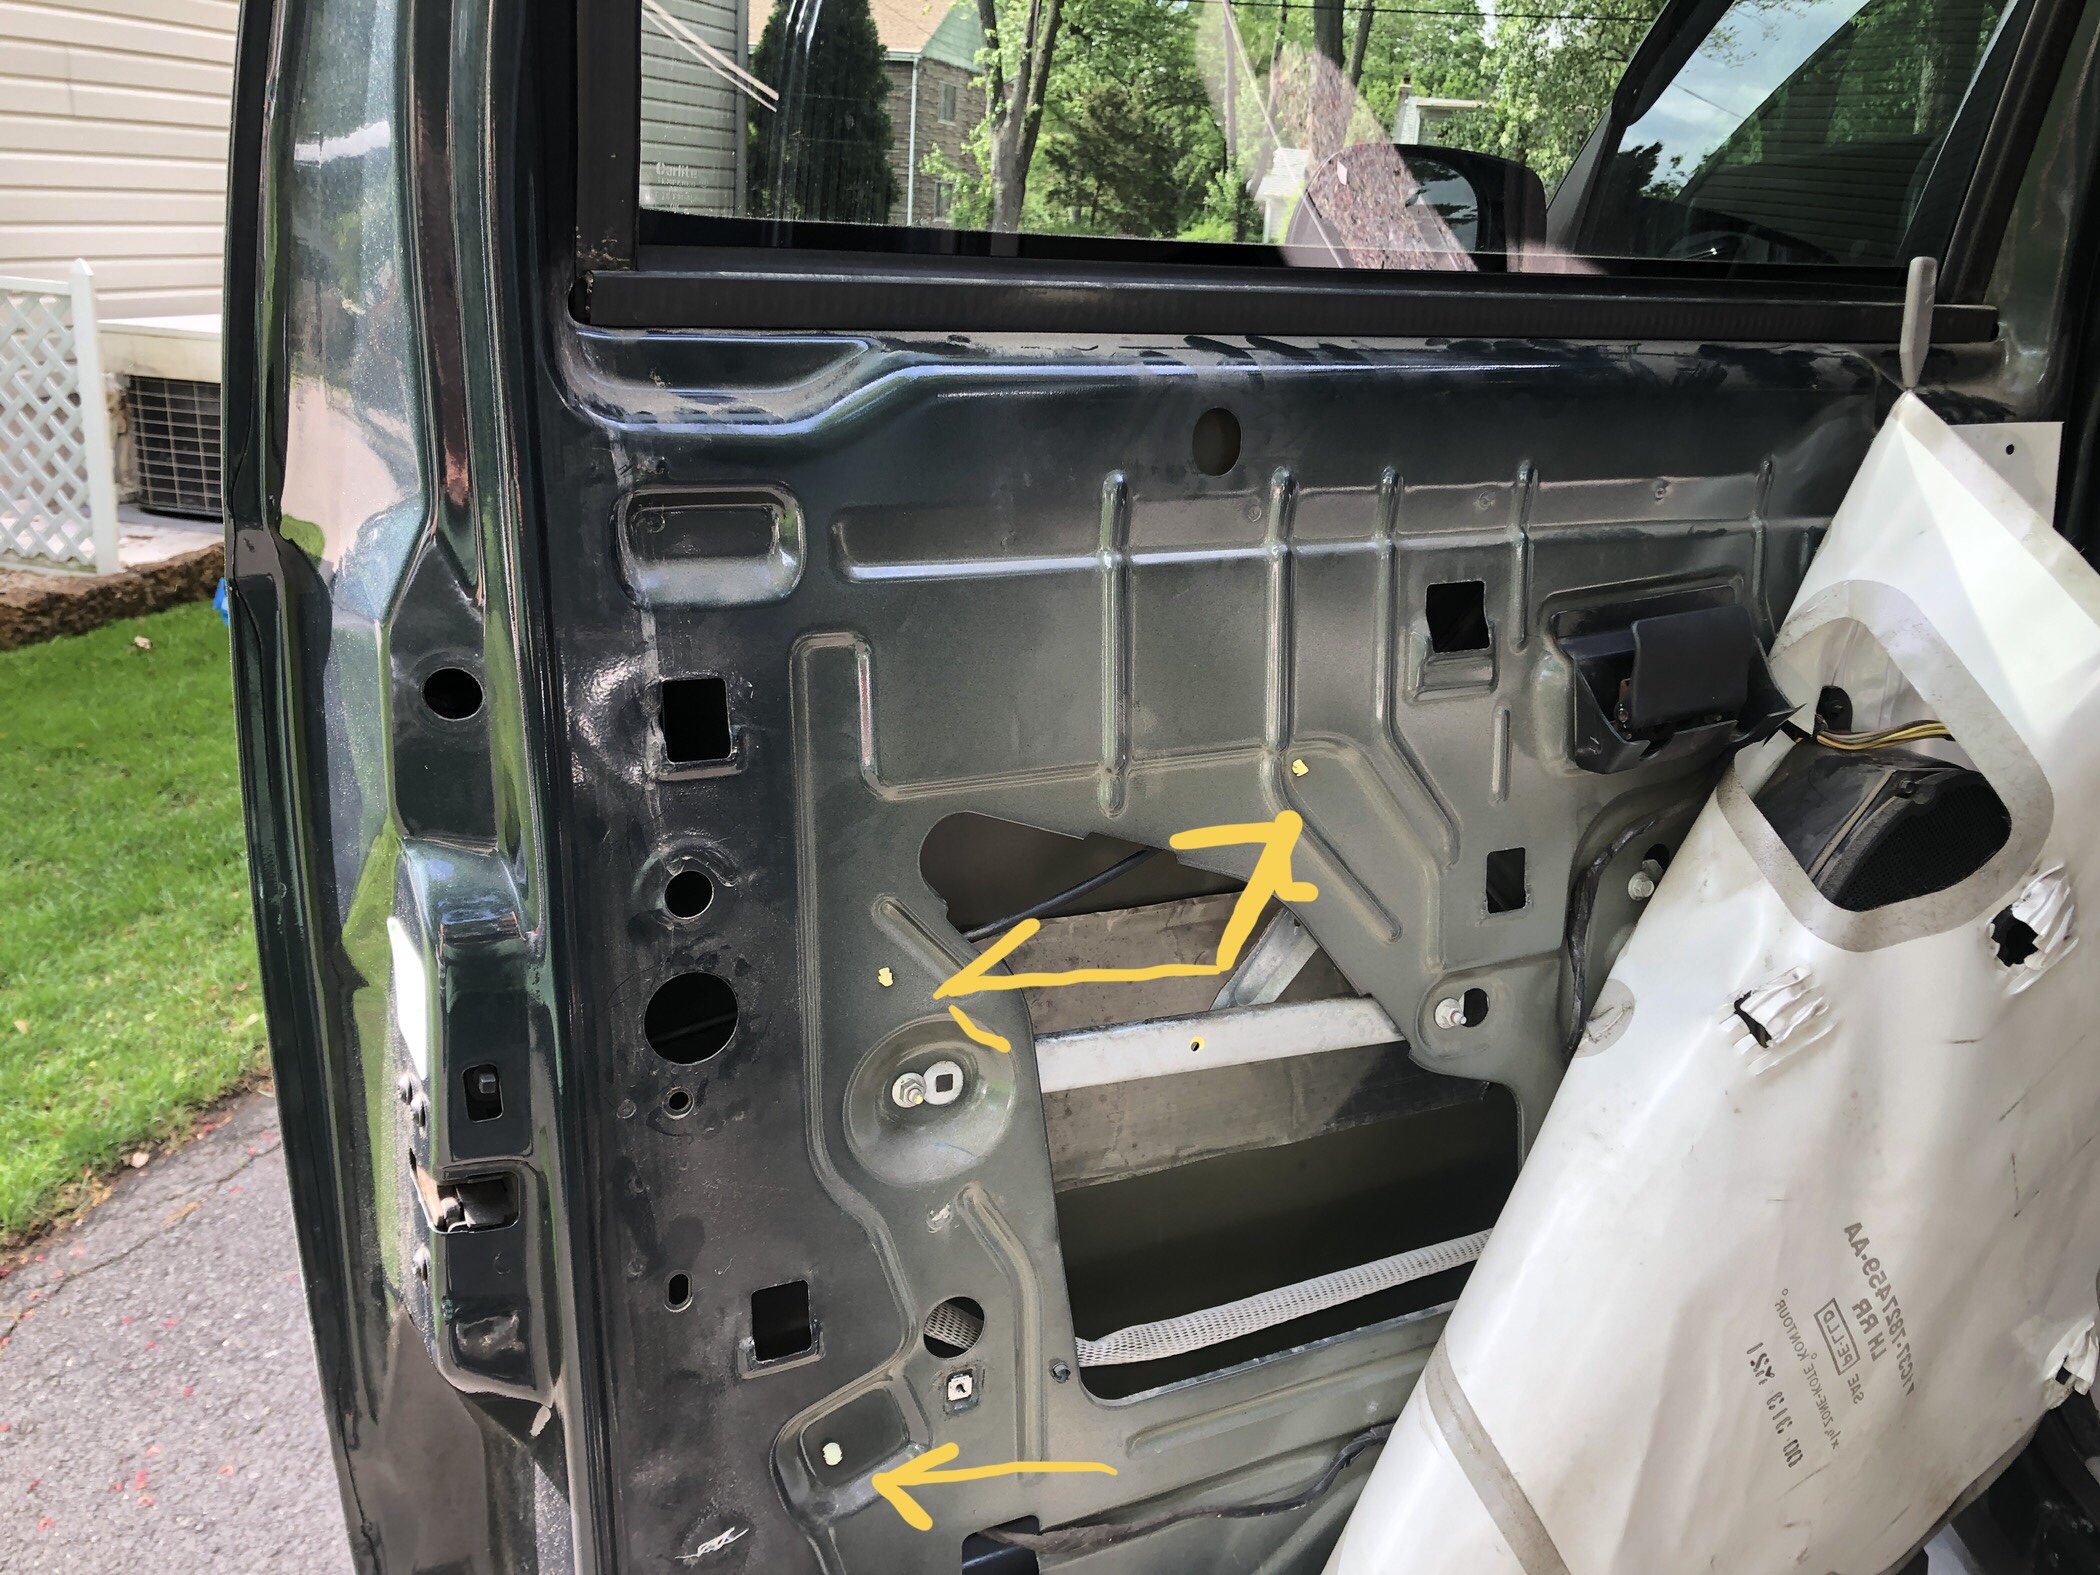
- Use needle nose pliers to squeeze wiring harness clip and interior door handle cable clip and push them into door cavity (see yellow arrows).
- Disconnect rod connecting lock button to latch assembly by rotating orange clip.
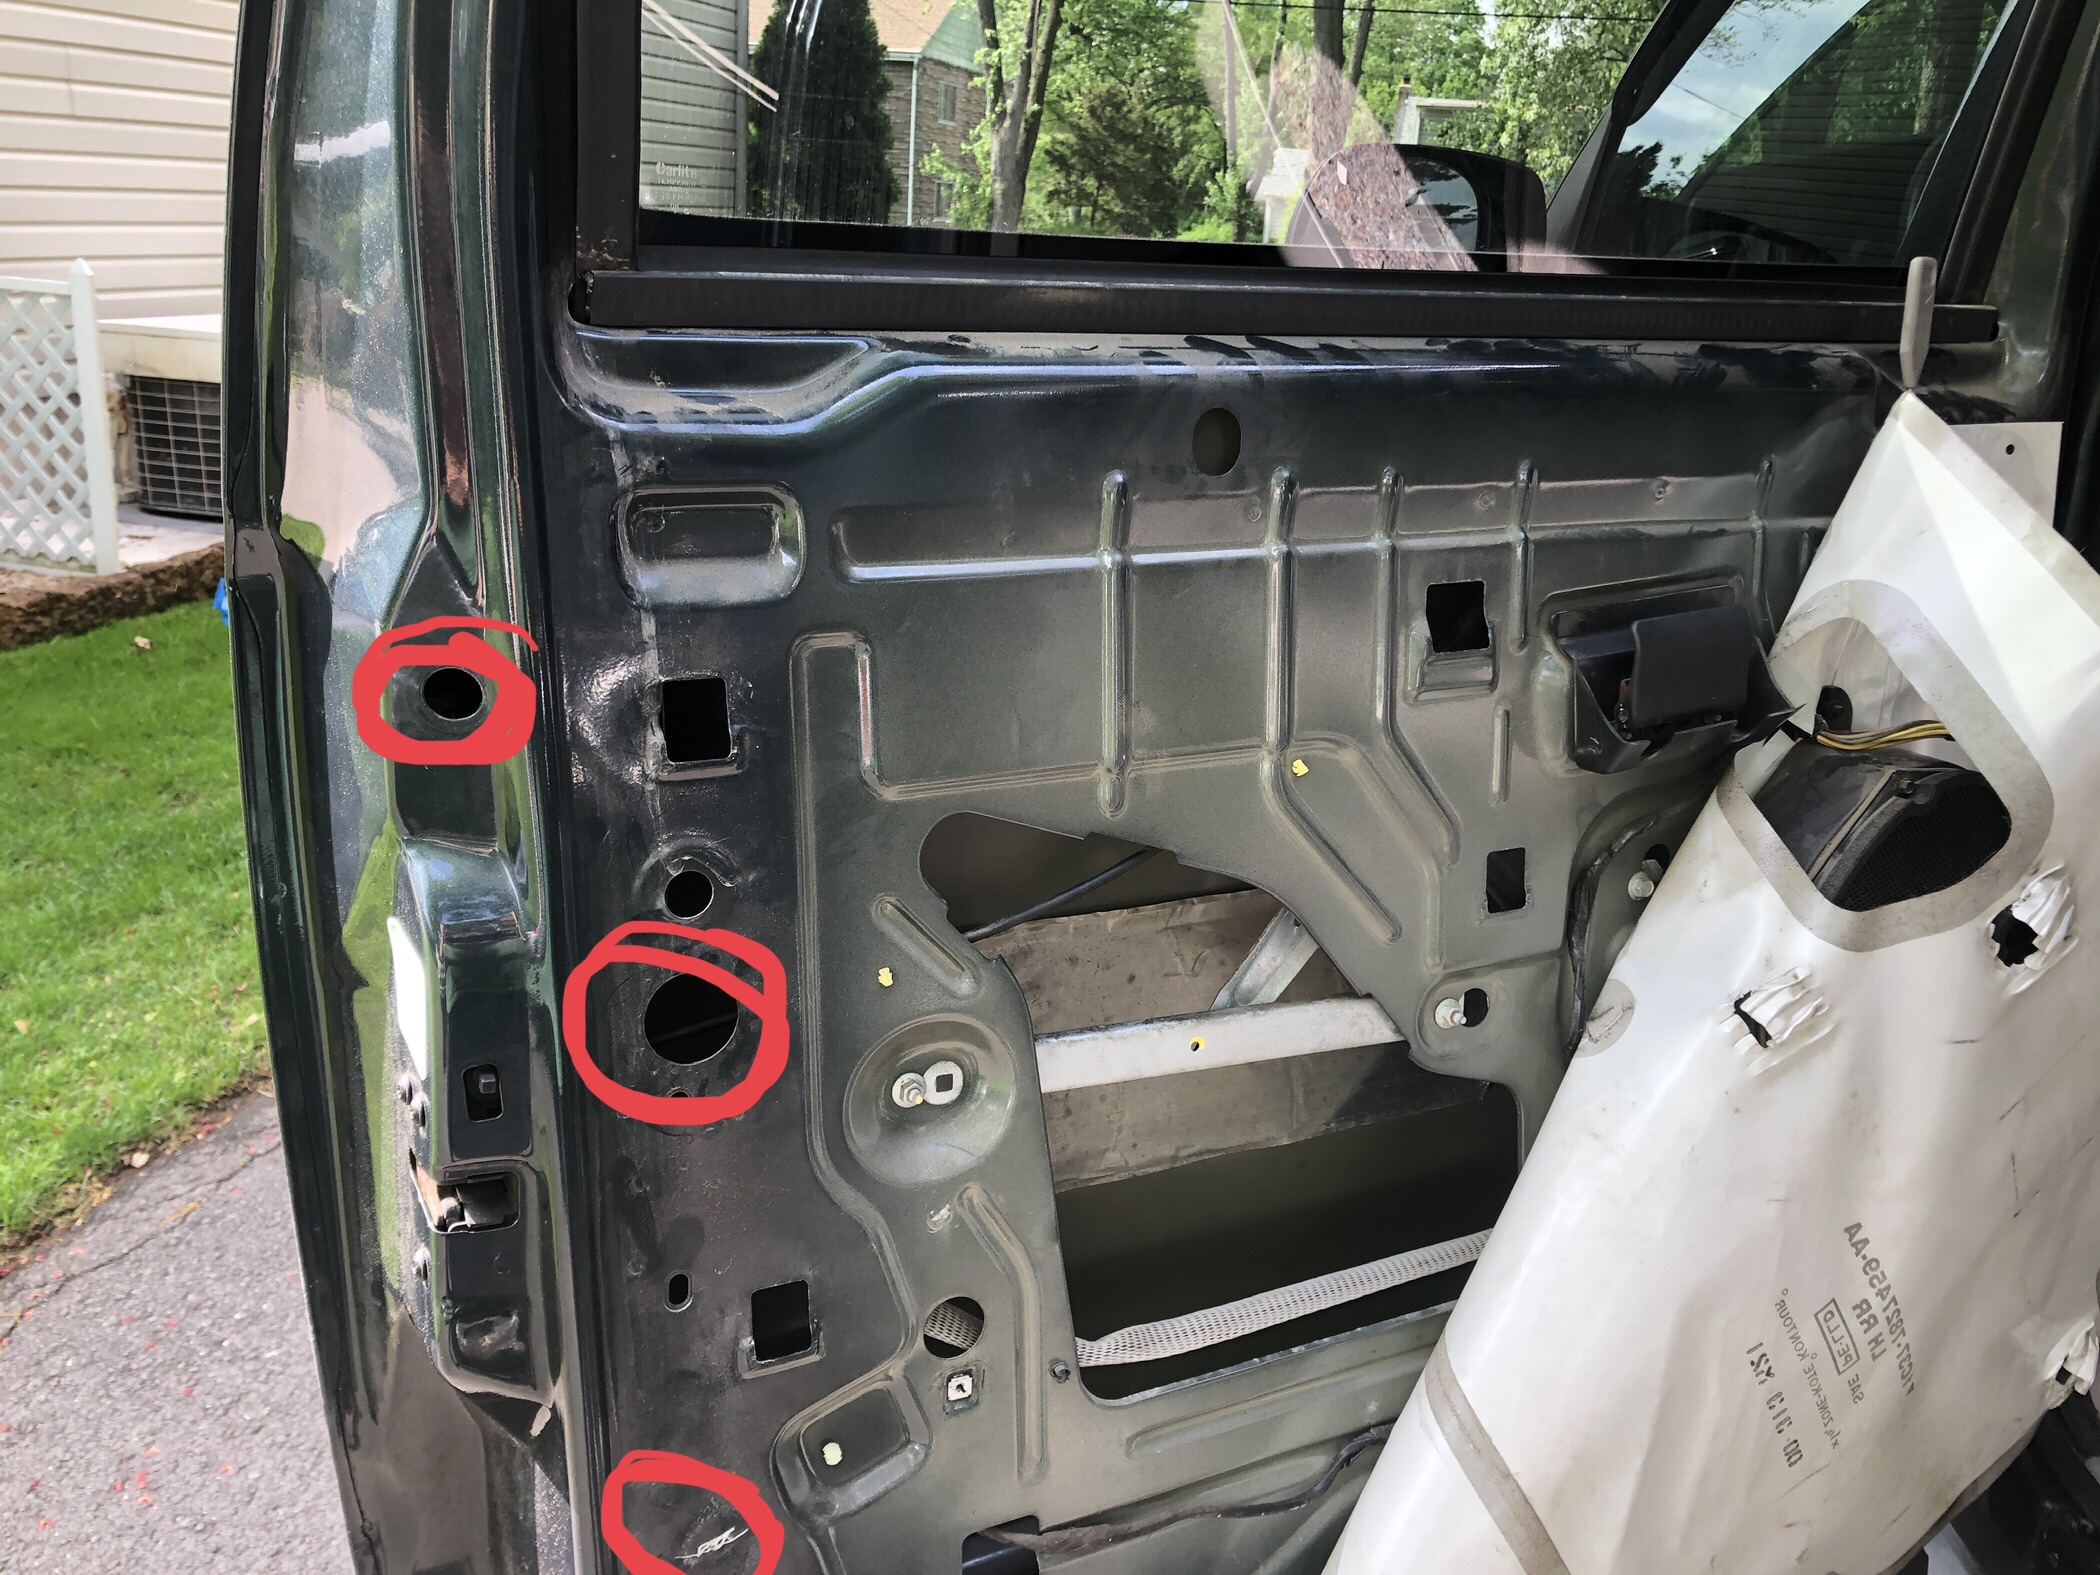
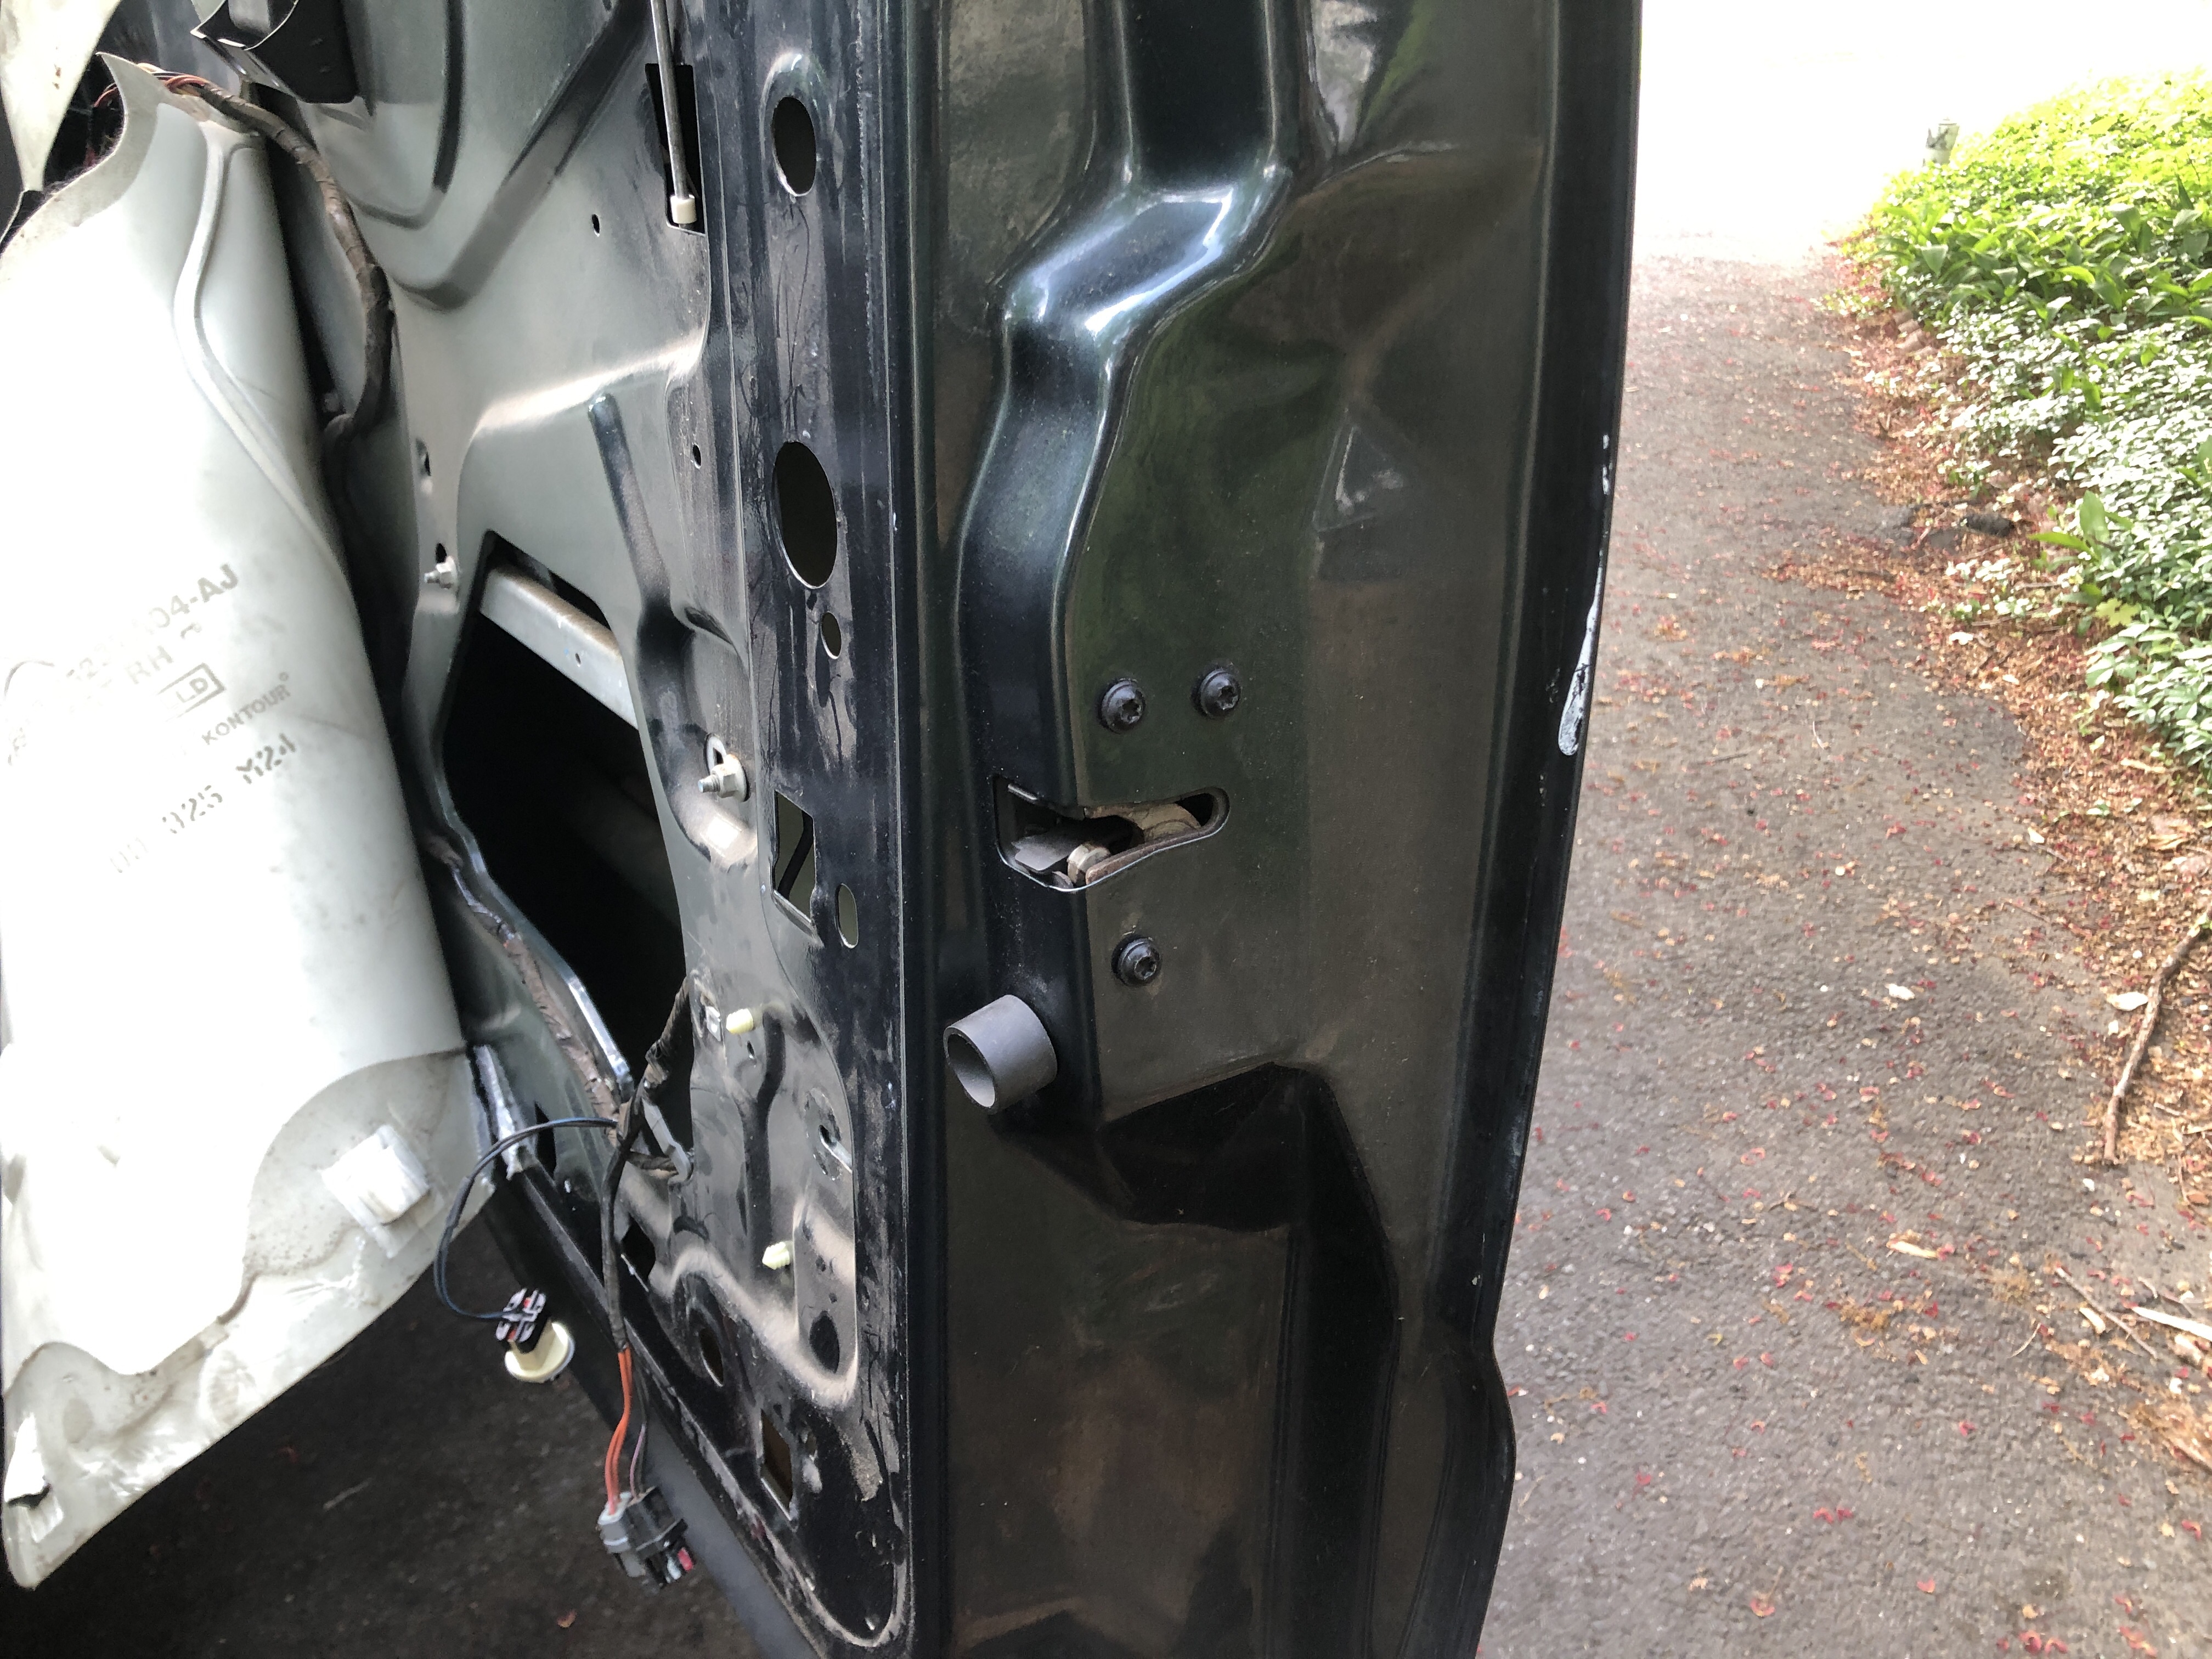
- Using 10mm socket remove bolt from bottom of window track. This will allow the window track to move out of the way.
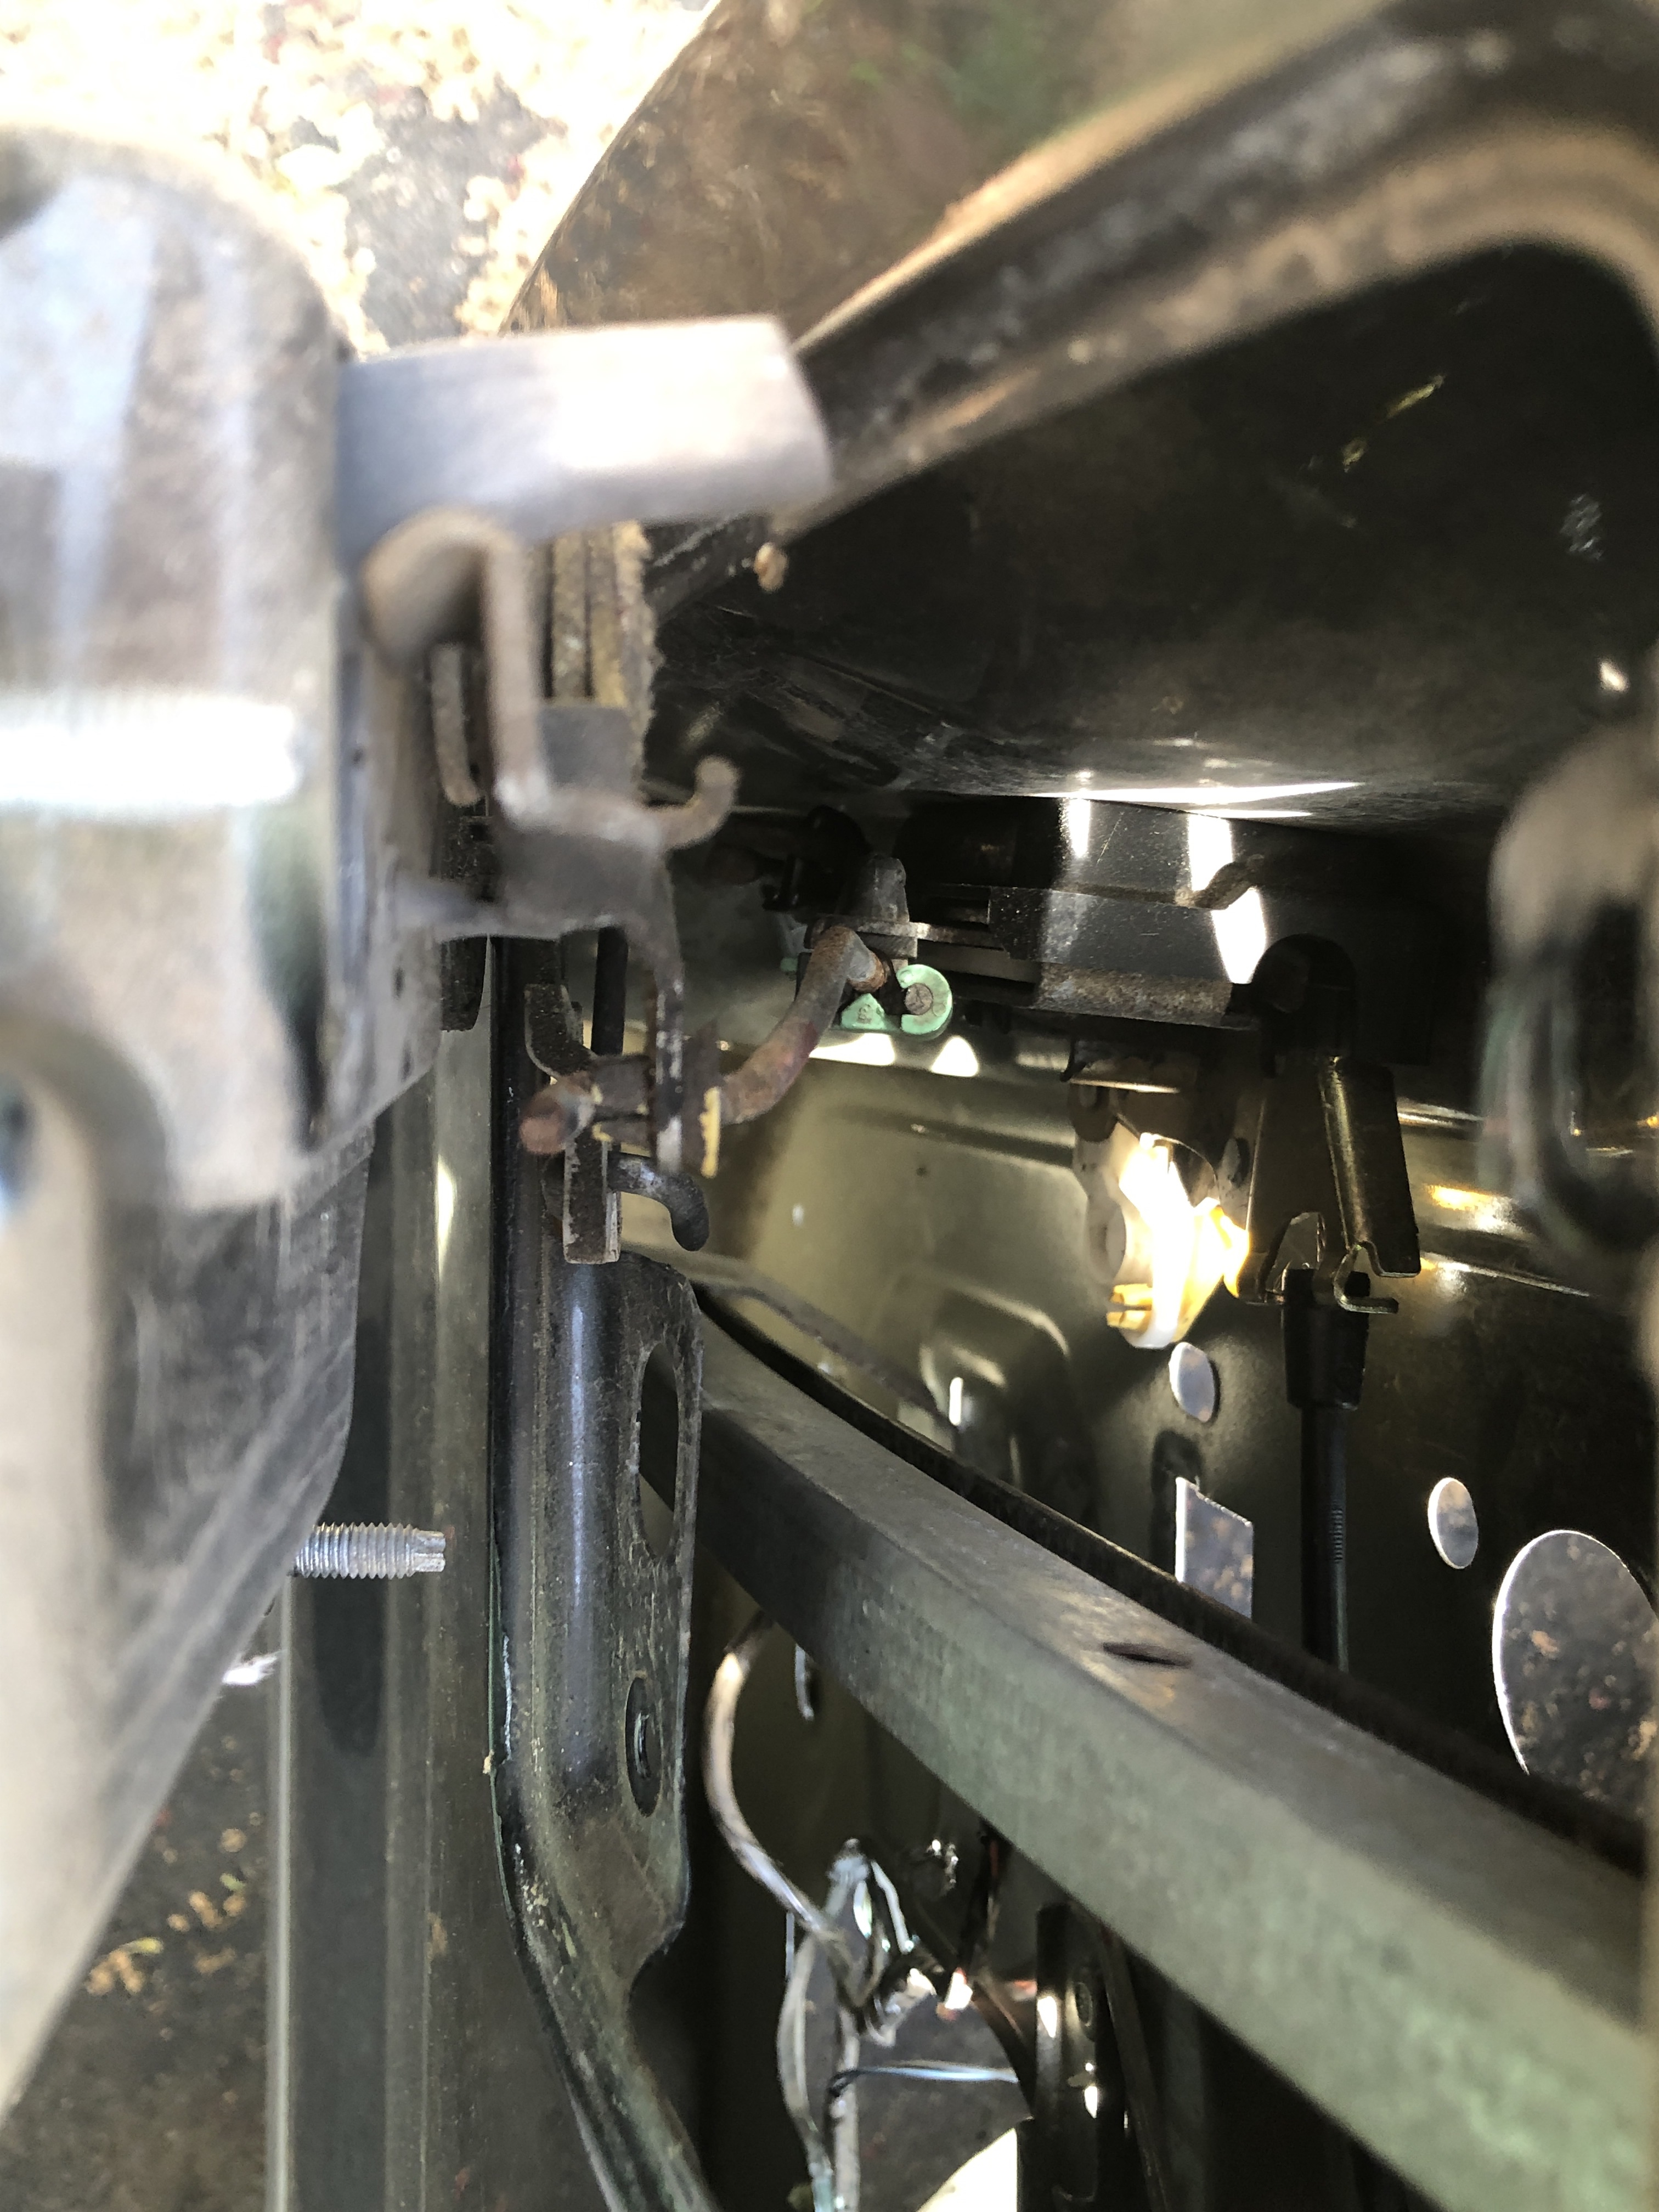
- Remove rubber plug.
- Using 11mm socket and extension, unbolt outside door handle.
- If you have a number pad on the drivers door, there will be a washer attached to the wiring harness on the upper bolt over the nut.
- Using small hook, open green clip around rod connecting outside handle to latch assembly.
- Front doors – rotate exterior handle assembly so you can remove the rod connecting the lock cylinder to the latch assembly.
- Using T27 bit, remove three screws from latch assembly.
- While pushing window track to the outside of door, pull latch assembly out of door. It will still have a wiring harness and the cable from interior handle attached.
- Unplug two electrical connectors from latch assembly.
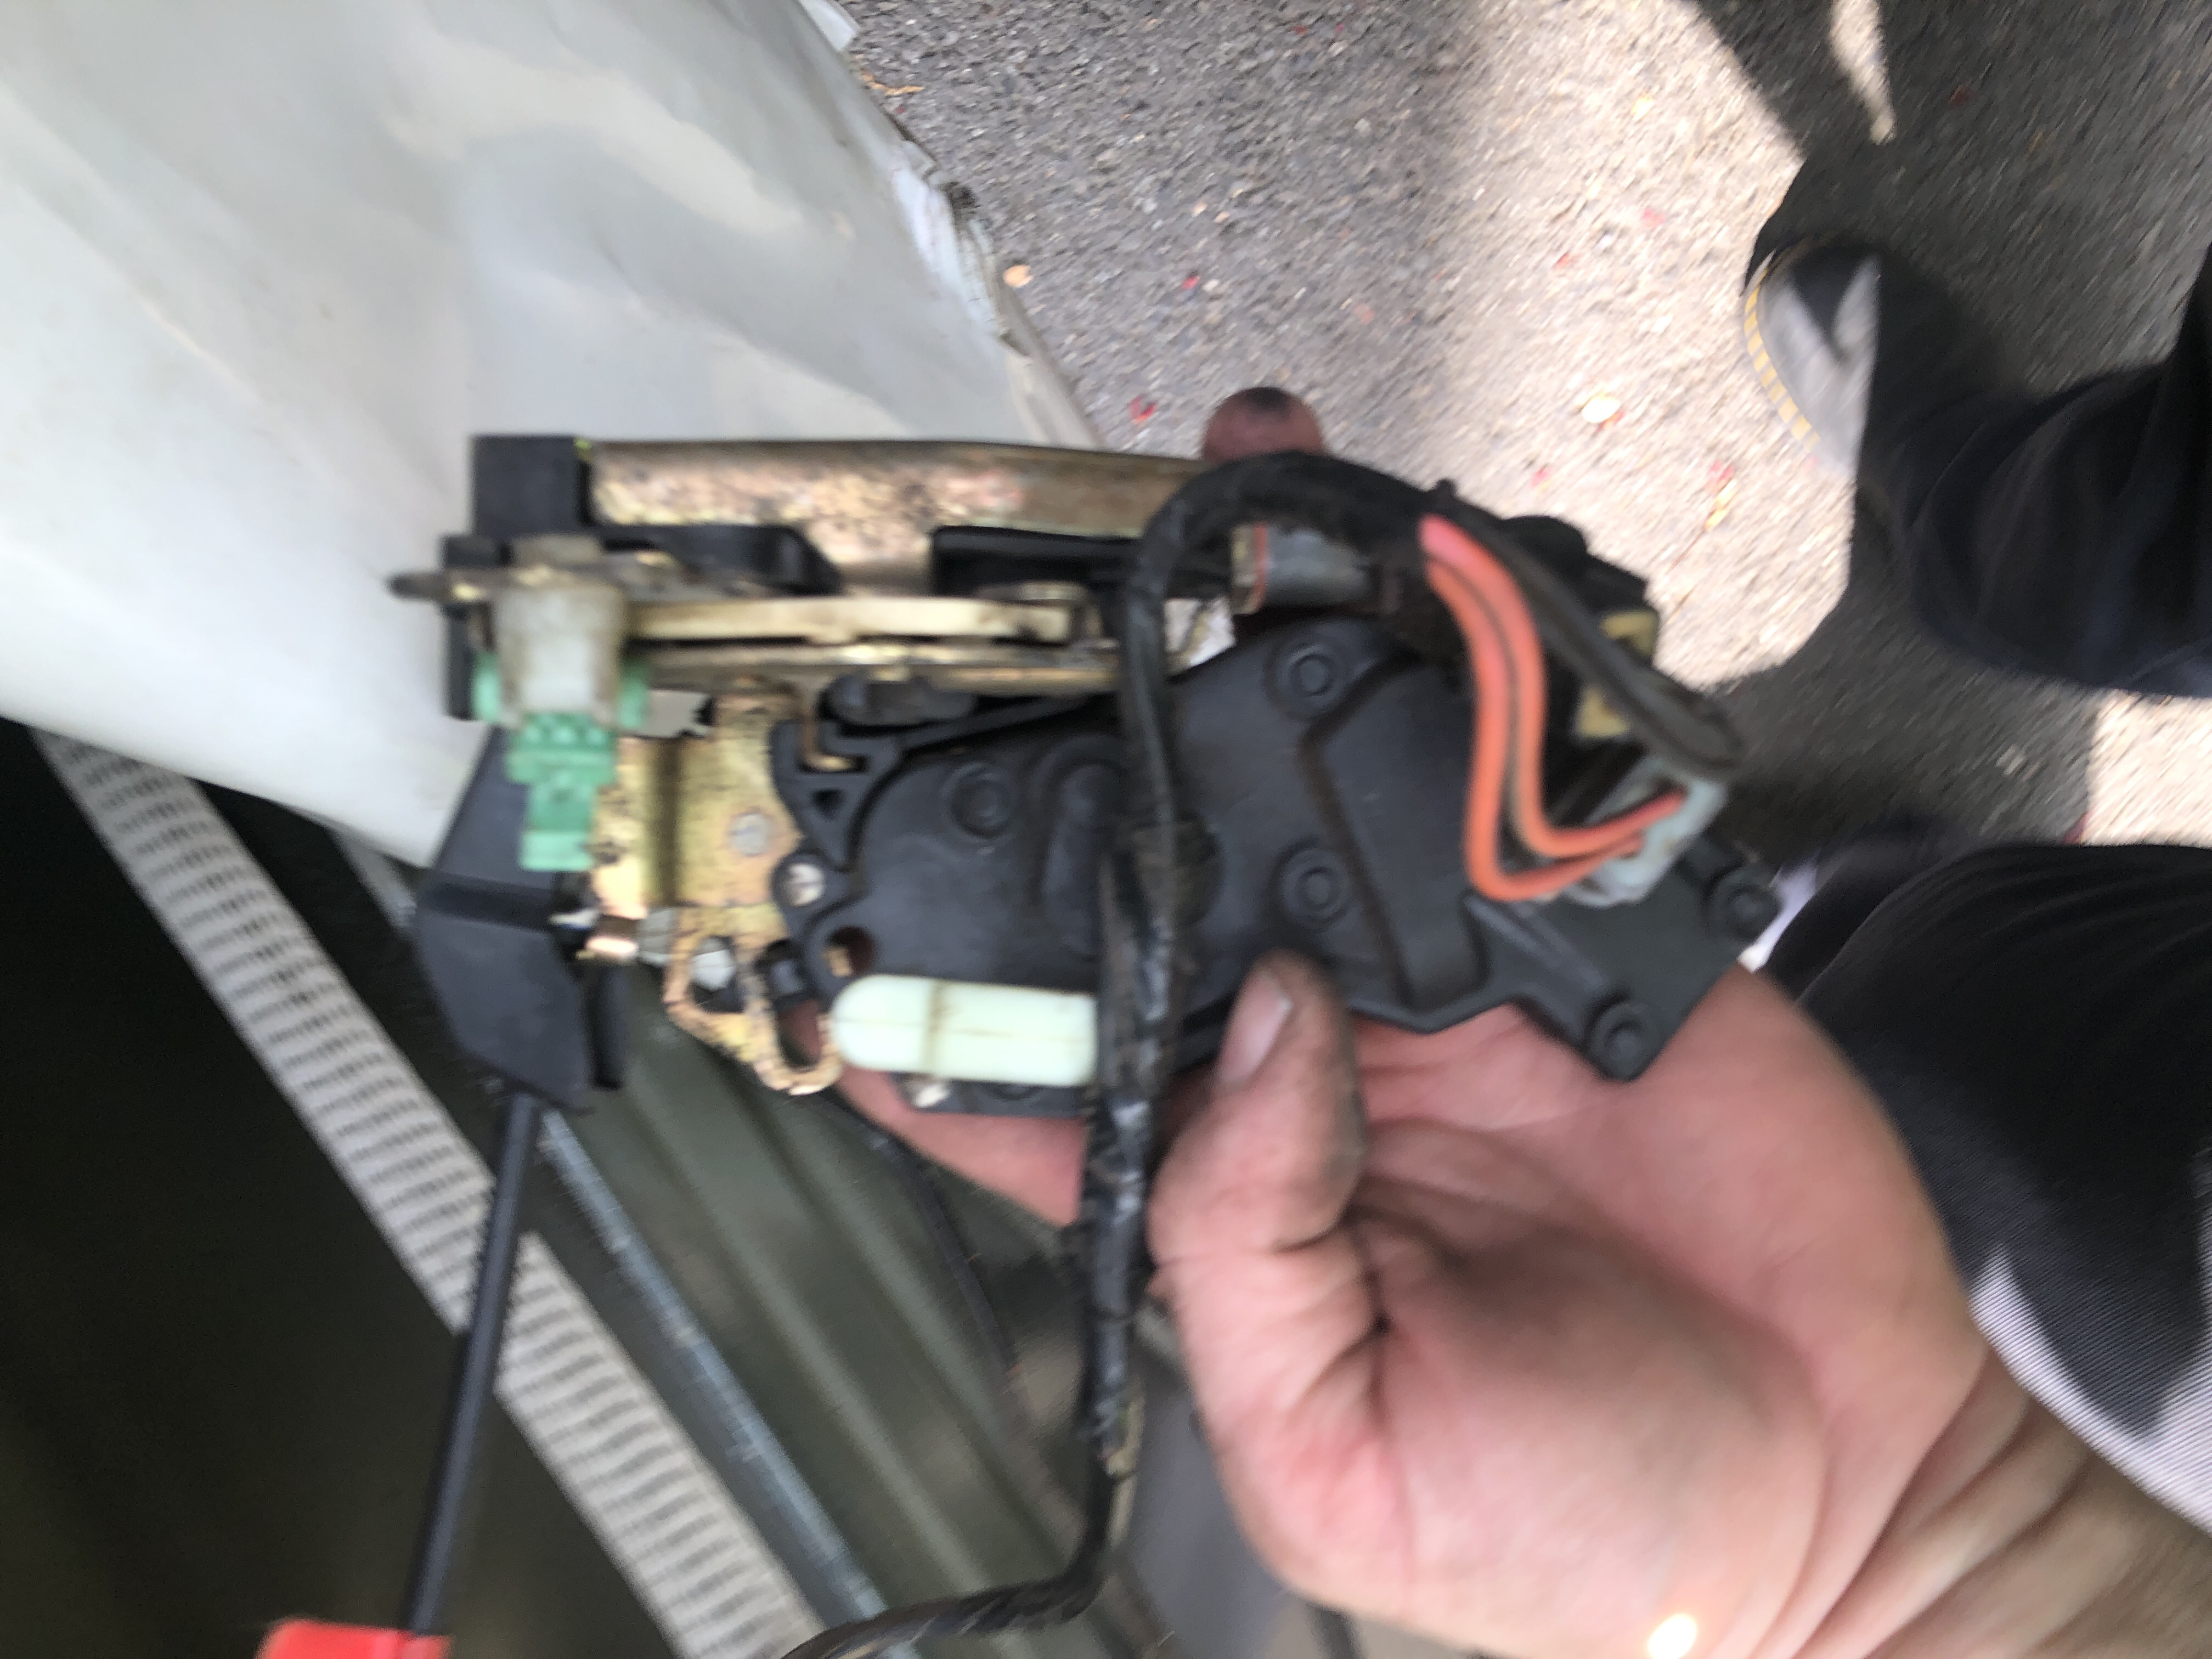
- Using a flat screwdriver, press latch down and slide lock actuator off of latch assembly.
- Attach new actuator to latch.
- Plug in two electric connectors.
- Put latch assembly back into door, making sure that wiring harness and cable are clear of window path.
- Start three Torx screws. Just enough to hold the latch in place but still able to wiggle about.
- Place the outside handle into the door.
- Put two nuts on door handle hand tight.
- Attach door handle rod to latch mechanism and secure with green clip. You may need to use the screwdriver to apply enough pressure to lock clip in place.
- Re-install rod connecting lock button to latch assembly.
- Fully tighten latch assembly.
- Test lock button by pulling up and down. If you have the rod connected properly, there should be no binding.
- Test lock actuator. You should see lock button go up and down.
- Fully tighten outside door handle.
- Insert rubber plug into access hole.
- Secure window track by re-installing bolt.
- Make sure window lowers fully without hitting any of the components you moved during this procedure.
- Re-install clips for wiring harness and inside door handle cable.
- Put plastic sheet back in place.
- Drop door panel back into slots. Front doors only, push courtesy light through door panel.
- Tighten two bolts to secure door panel.
- Install reflector / lens.
- Connect door harnesses to door switch panel.
- Press door switch panel into place (rear first) until all clips lock in.
- Re-install sail panel.
Legal jibber-jabber
- As an Amazon Affiliate, I may earn commission if you purchase something linked from this page.
- Product reviews – unless stated otherwise, I have purchased all reviewed products with my own money.
- “Manufacturers claims” are exactly that. Their claims. If my text says “manufacturer claims” it means I haven’t checked it and I probably don’t have a way to check it. Hydrostatic ratings, R-values, Temperature ratings, etc.
- Follow these instructions at your own risk. I’m not a professional anything. I’m just some random human you encountered on the internet. I may or may not have any idea what I’m doing. I certainly have no idea what you’re doing. I accept no liability for injury, property damage or any other direct or indirect damages you may incur from anything on this page or any other pages I may or may not have authored.
- Copyright Reserved Creative Commons – Attribution, Non-Commercial, Share Alike . If I’ve inspired you, link back to this page. Don’t steal my text or photos. Feel free to modify my designs in any way you see fit. Don’t try to make yourself money from my ideas.
- Comments will be moderated. Those that add to the discussion will be allowed. Those that add nothing will be deleted. If you don’t agree with my decisions, get your own website.
- DON’T PANIC
