
This project started in fall of 2020 when I was down with Covid. If I was a better writer, it would have come as a vision born of fever dreams, but it was really boredom.
Planning
As all my projects do, I started with a list of the things I wanted to include, then began refining my list. I removed the turntable from this build, because that would have added a lot of cost and complexity. The turntable will be included in the family room entertainment center when that one is built.
- Dry bar
- Glassware storage & display
- Storage for wine & liquor bottles and bar tools
- Countertop for mixing and serving
- State of the A/V system
- Large TV
- 4K. (Skip 8K, as there isn’t media yet and I don’t think it’s going to be any more successful than 3D TV was)
- Atmos
- AirPlay
- Apple TV 4K (I held out for the 2021 version with updated remote)
- 4K Blu-ray player w/ Atmos support
Turntable (I still have records, though most of them have been digitized)Receiver (deleted as it was only needed for the turntable and made the sound bar more cumbersome to use)
- Visually minimal, as this is the front room of the house, not a dedicated theater room.
- Easy to use for the wife and kids
- Large TV
- Display space for things I want to show off
- Covered storage for things I don’t want to show off.
- Media storage for the DVDs (until I can get them onto the server)
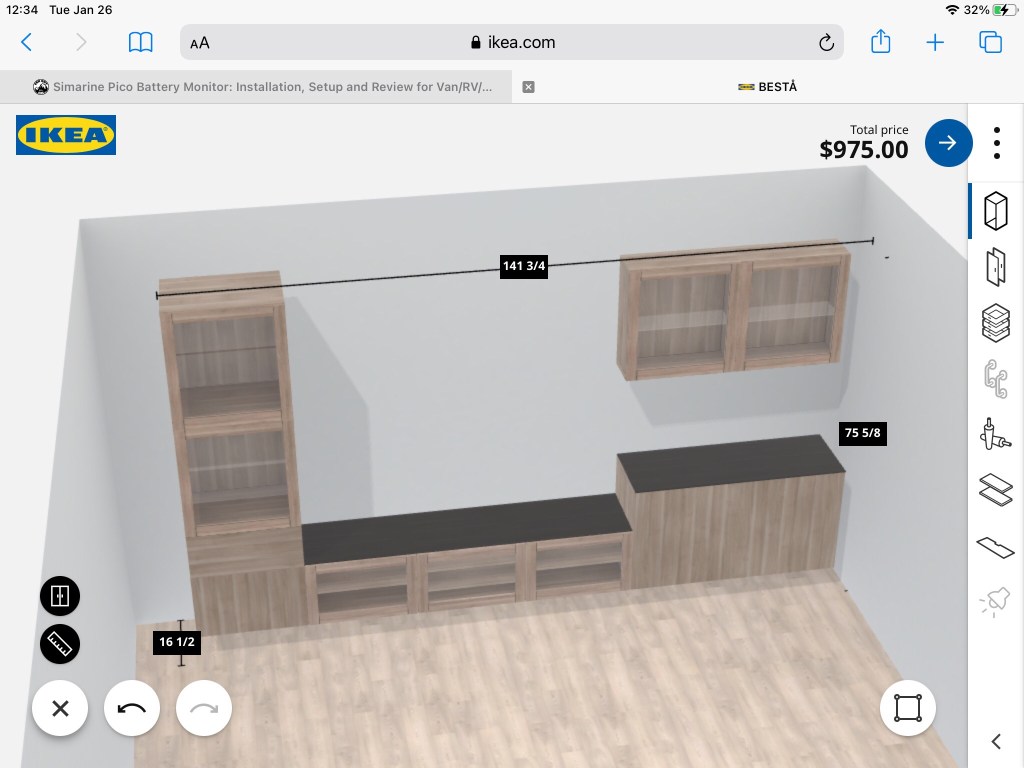
IKEA has an several online planning tools which allow you to visualize what your build will look like and also keep track of all the parts you need. I went through several iterations before I settled on this one as a decent amount of storage with a room for good sized television .
I knew I wanted to get an Atmos sound bar, and I have settled on Sonos as my whole house audio solution, so the Arc was an easy decision. I also included a Sub and two Symfonisk speakers to the audio system.
TV shopping was tough. I haven’t carefully shopped for a television since they had picture tubes. I’ve bought super deals, but I haven’t had the money to buy anything that wasn’t on a steep discount. RTINGS.com was very helpful in this regards as they do calibrated testing. I decided that the TCL Series 6 was my sweet spot for performance v. cost.
Waiting
I had a week of vacation scheduled between Christmas and New Years (and I was out on disability until February), but the cabinets were not available.
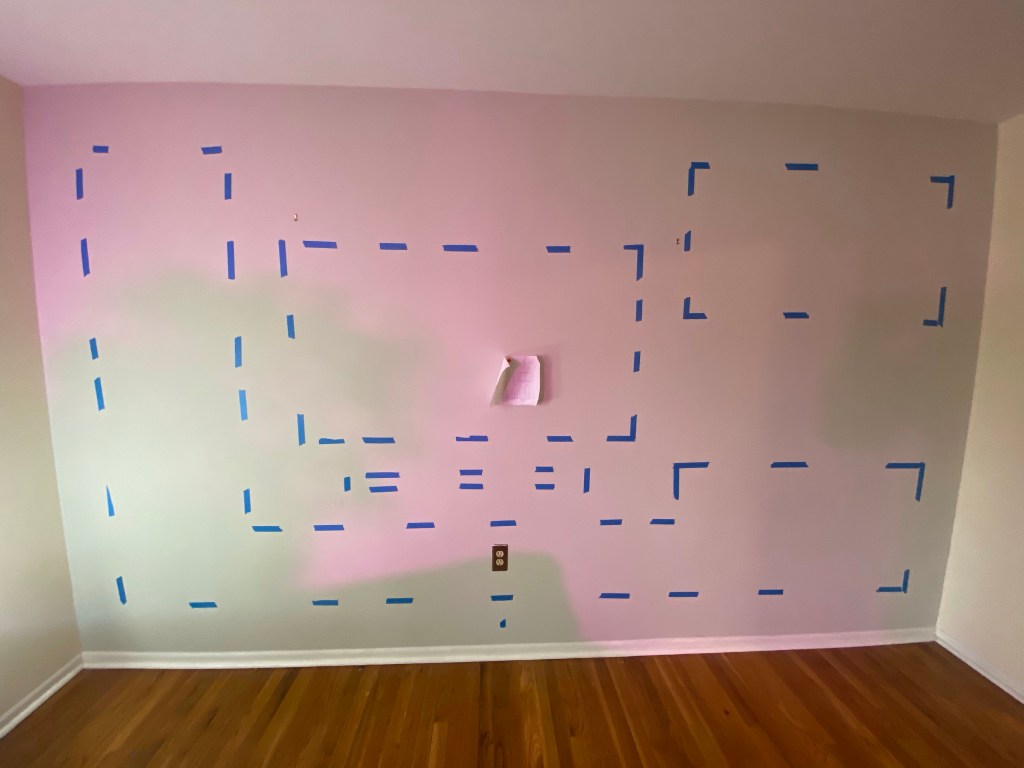
I wanted to see how things would fit, so one morning I decided to tape out the cabinets.
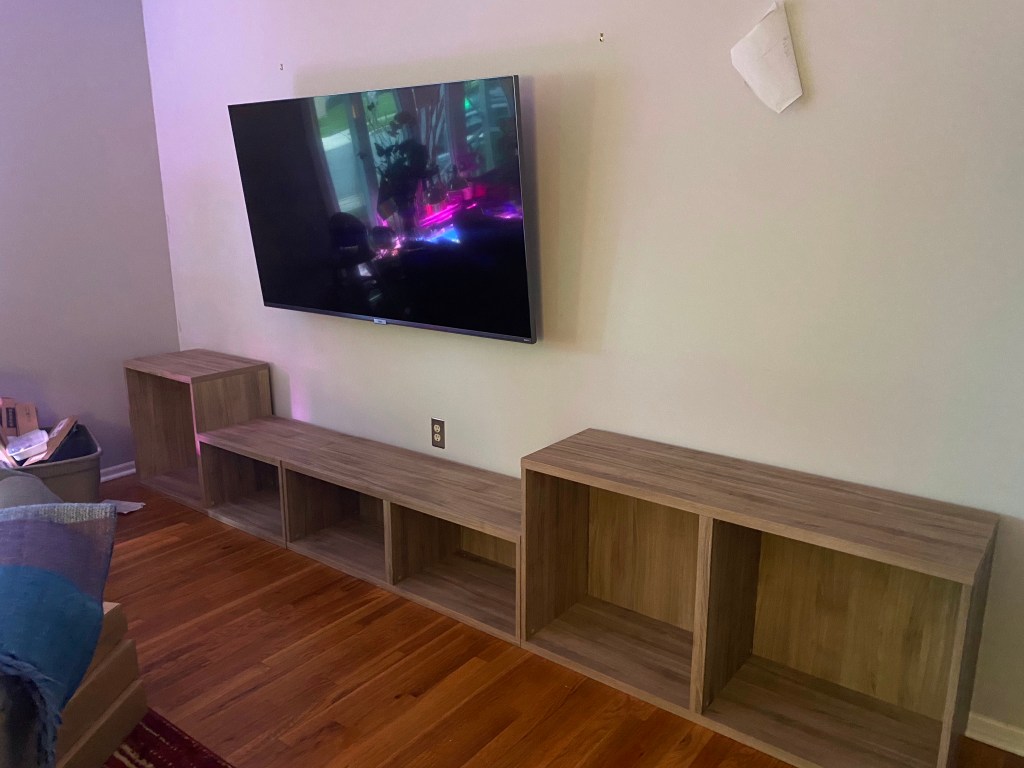
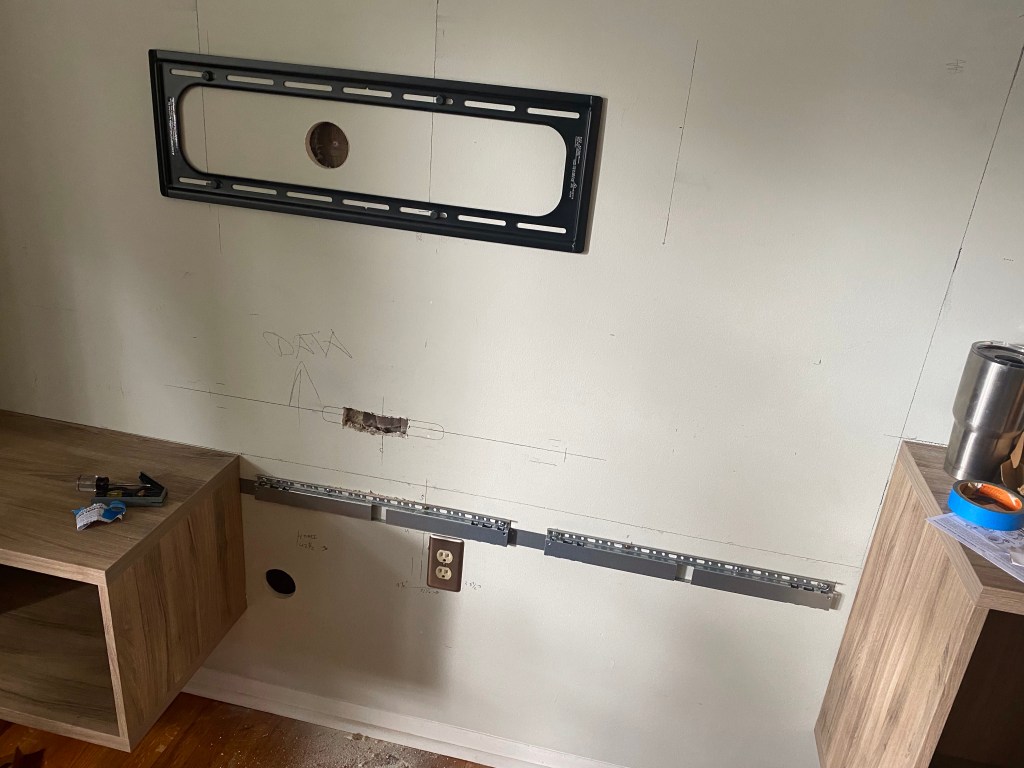
Come April, I hung the TV, but still no cabinets.
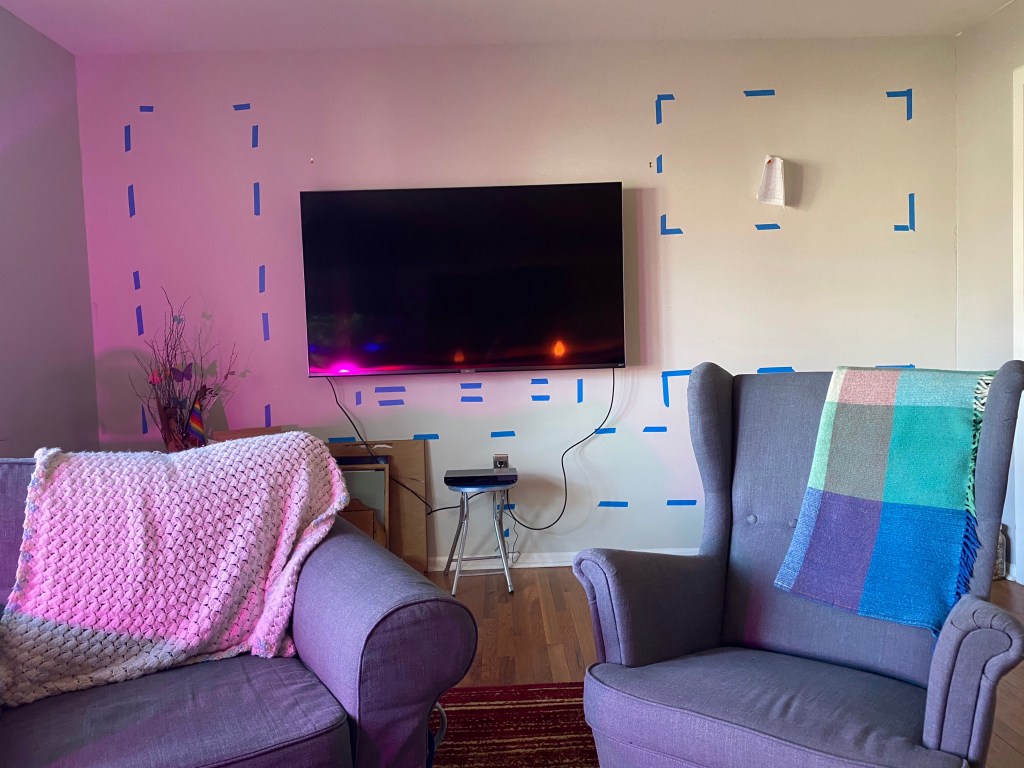
Given the design of the wall mount, I wasn’t concerned about the tv being slightly off. There are several inches of side to side play. The mount for the Arc, is a different story. There is zero room for error as the mount is exactly the size of the speaker, and the speaker must be front and center.
Building (finally)
After checking stock levels at IKEA daily, for six months, I finally found that the majority of my stuff was available to order online, and the parts I couldn’t order online were available at my second-closest store.
The staging of this project was nutty. I have a laser level to ensure that the cabinets would be installed level and plumb, but it’s a red laser. Given that the finish wall color was going to be dark red, I wouldn’t be able to see laser or pencil marks, so I had to hang the cabinets before painting. On the plus side, hanging the cabinets first let me KNOW where I was going to be able to put holes in the wall to run wires. (Pro Tip – if you’re putting wires through the cabinet, drill through the the cabinet back while it’s mounted to ensure your holes in cabinet and sheet rock line up.)
Given that my house was built by drug addled carpenters in the early seventies, (there isn’t a single square corner in the house) and the cabinets were designed in metric, I wanted to build the bottom row and physically center them on the wall.
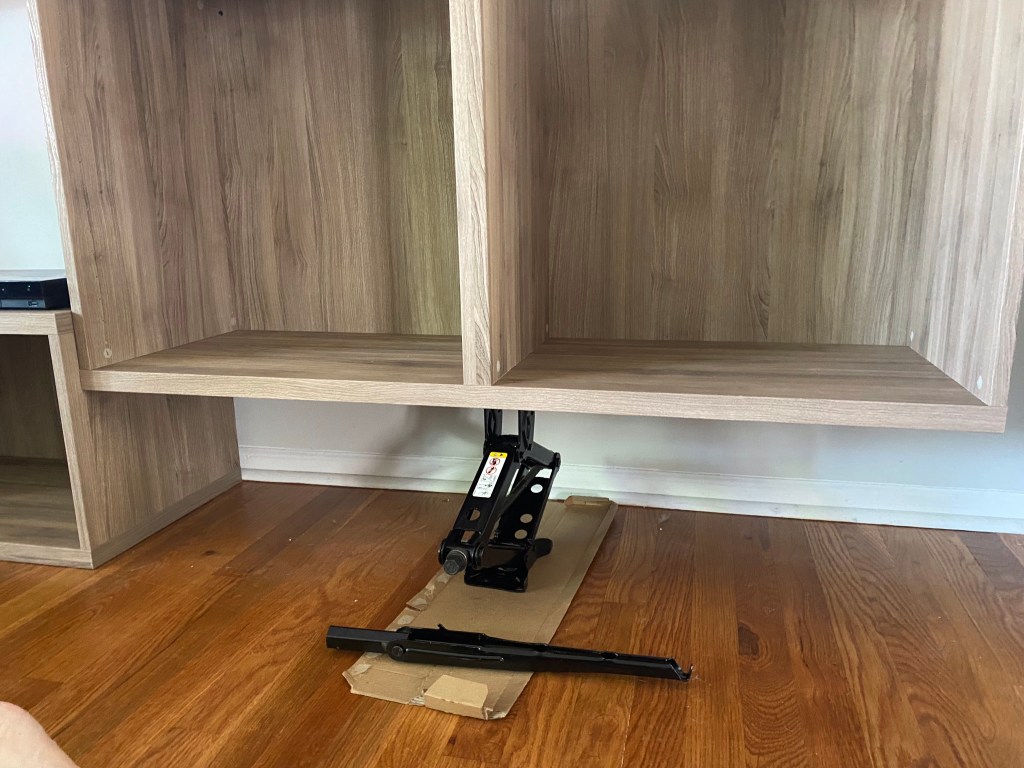

The cabinets hang on a metal cleat, but the cleat is located by holding the cabinet against the wall and scribing both top corners. I can’t hold a cabinet with one hand and trace it without moving the cabinet, so I used a the jack from the minivan.
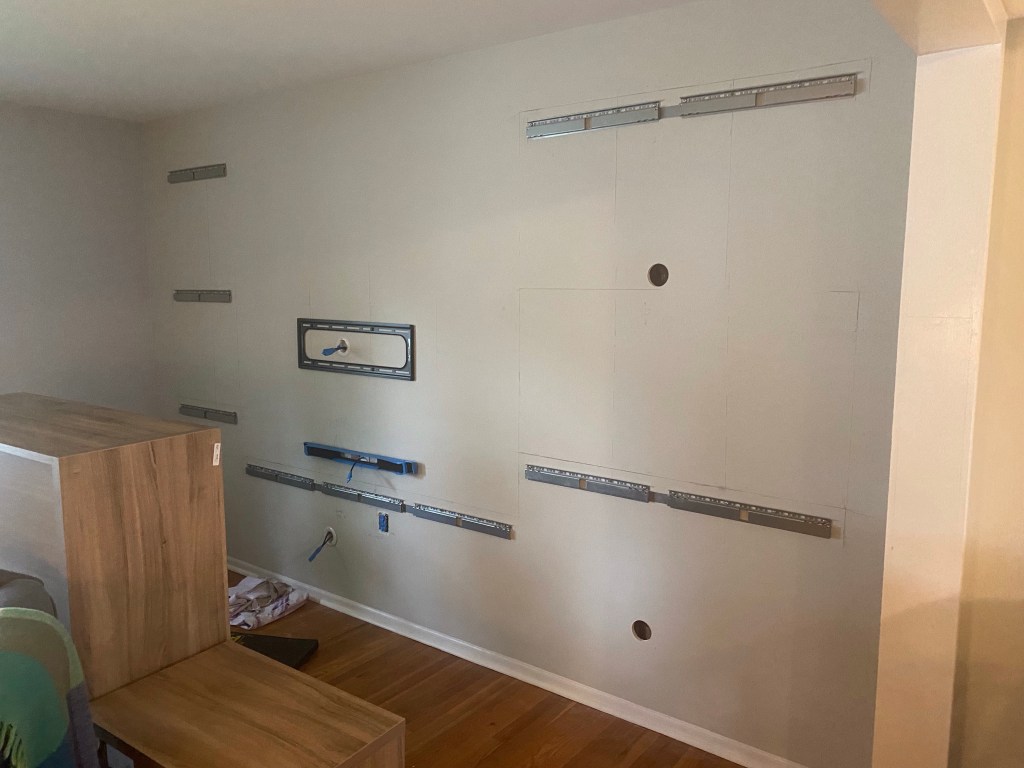
Each cabinet, there are 10, is mounted with three drywall anchors and one screw into a stud. Four lag bolts into studs for the TV. Four more anchors for the sound bar.
Once I had everything hung, I took all the components off the wall, leaving just the cleats and mounts. (I numbered each cabinet so I would know where to put them back) Now to fish wires.
Power set, which needs to start in the middle and get pulled to top and bottom. Two HDMI cables from the lower cabinet to the TV and one from the sound bar to the TV.
Once I had all my wires fished, I taped over all the ends and started painting. I can’t imagine that paint will do anything good for an HDMI plug.
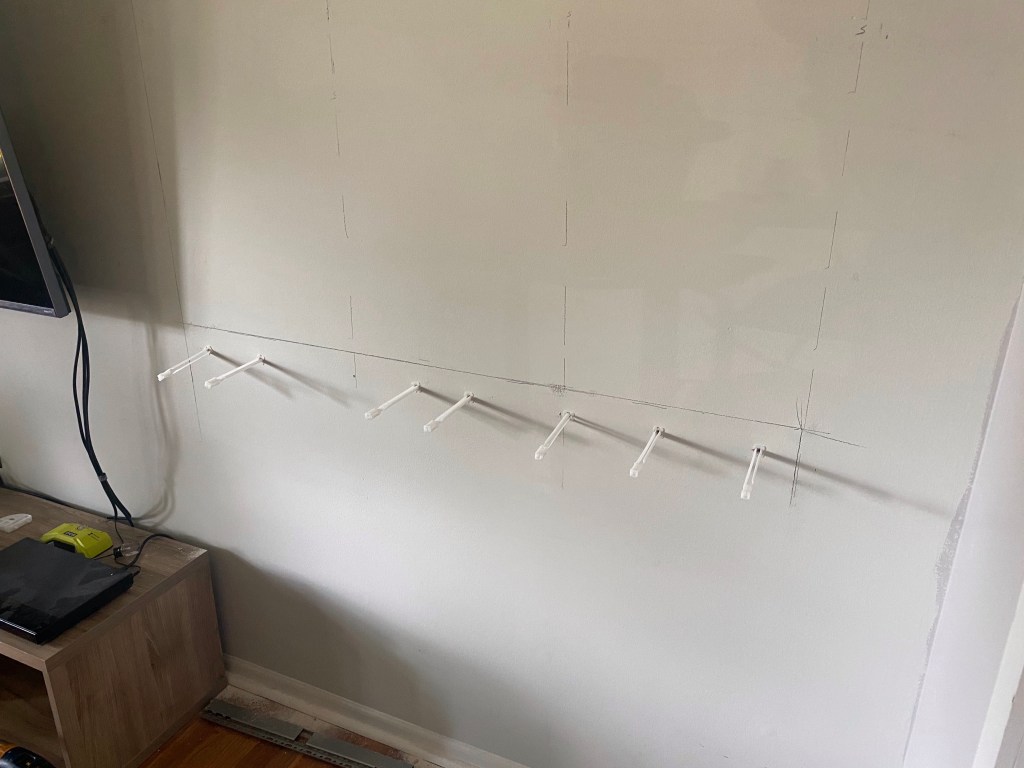
Before I rehung the cabinets, I installed the low voltage lighting. Using my combination square, I centered each light puck both side-to-side and front-to-back on the necessary cabinets. I drilled holes through the cabinets to get the wires behind the back panels.
The sound bar came with a six foot long power cord, but I didn’t have room for all that. In America, the standard plug is called a NEMA-15P. The Arc end of the cord (according to this image) is called a C7.

A bit of Google-fu, [12” NEMA-15P C7] found me a 12” power cord. It’s short enough that I don’t need zip tie to keep it tucked out of sight.
There was a pesky stud in the way, so I had to replace my HDMI cables with longer ones. Also, the original placement of the TV outlet interferes with one the brackets on the back of the TV, so I had to drill a second 3” hole behind the TV.
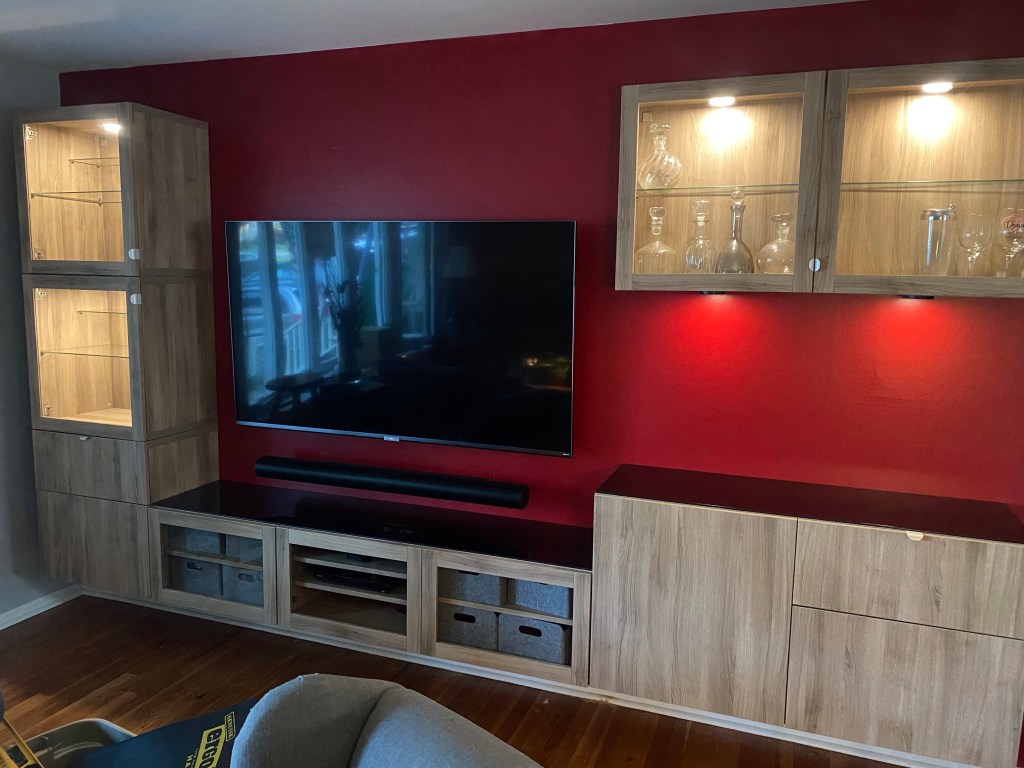
It took me a solid weekend to mount the cabinets, paint the wall, fish the wires, and remount everything. Installation of the shelves and doors, I completed a bit at a time after work.
Legal jibber-jabber
- As an Amazon Affiliate, I may earn commission if you purchase something linked from this page.
- Product reviews – unless stated otherwise, I have purchased all reviewed products with my own money.
- “Manufacturers claims” are exactly that. Their claims. If my text says “manufacturer claims” it means I haven’t checked it and I probably don’t have a way to check it. Hydrostatic ratings, R-values, Temperature ratings, etc.
- Follow these instructions at your own risk. I’m not a professional anything. I’m just some random human you encountered on the internet. I may or may not have any idea what I’m doing. I certainly have no idea what you’re doing. I accept no liability for injury, property damage or any other direct or indirect damages you may incur from anything on this page or any other pages I may or may not have authored.
- Copyright Reserved Creative Commons – Attribution, Non-Commercial, Share Alike . If I’ve inspired you, link back to this page. Don’t steal my text or photos. Feel free to modify my designs in any way you see fit. Don’t try to make yourself money from my ideas.
- Comments will be moderated. Those that add to the discussion will be allowed. Those that add nothing will be deleted. If you don’t agree with my decisions, get your own website.
- DON’T PANIC
