
Tools (trash bag holder)
- Ratcheting tubing cutter (if you don’t have a tubing cutter, you can use a hack saw)
- Tin snips *optional for bag clips*
Materials (trash bag holder)
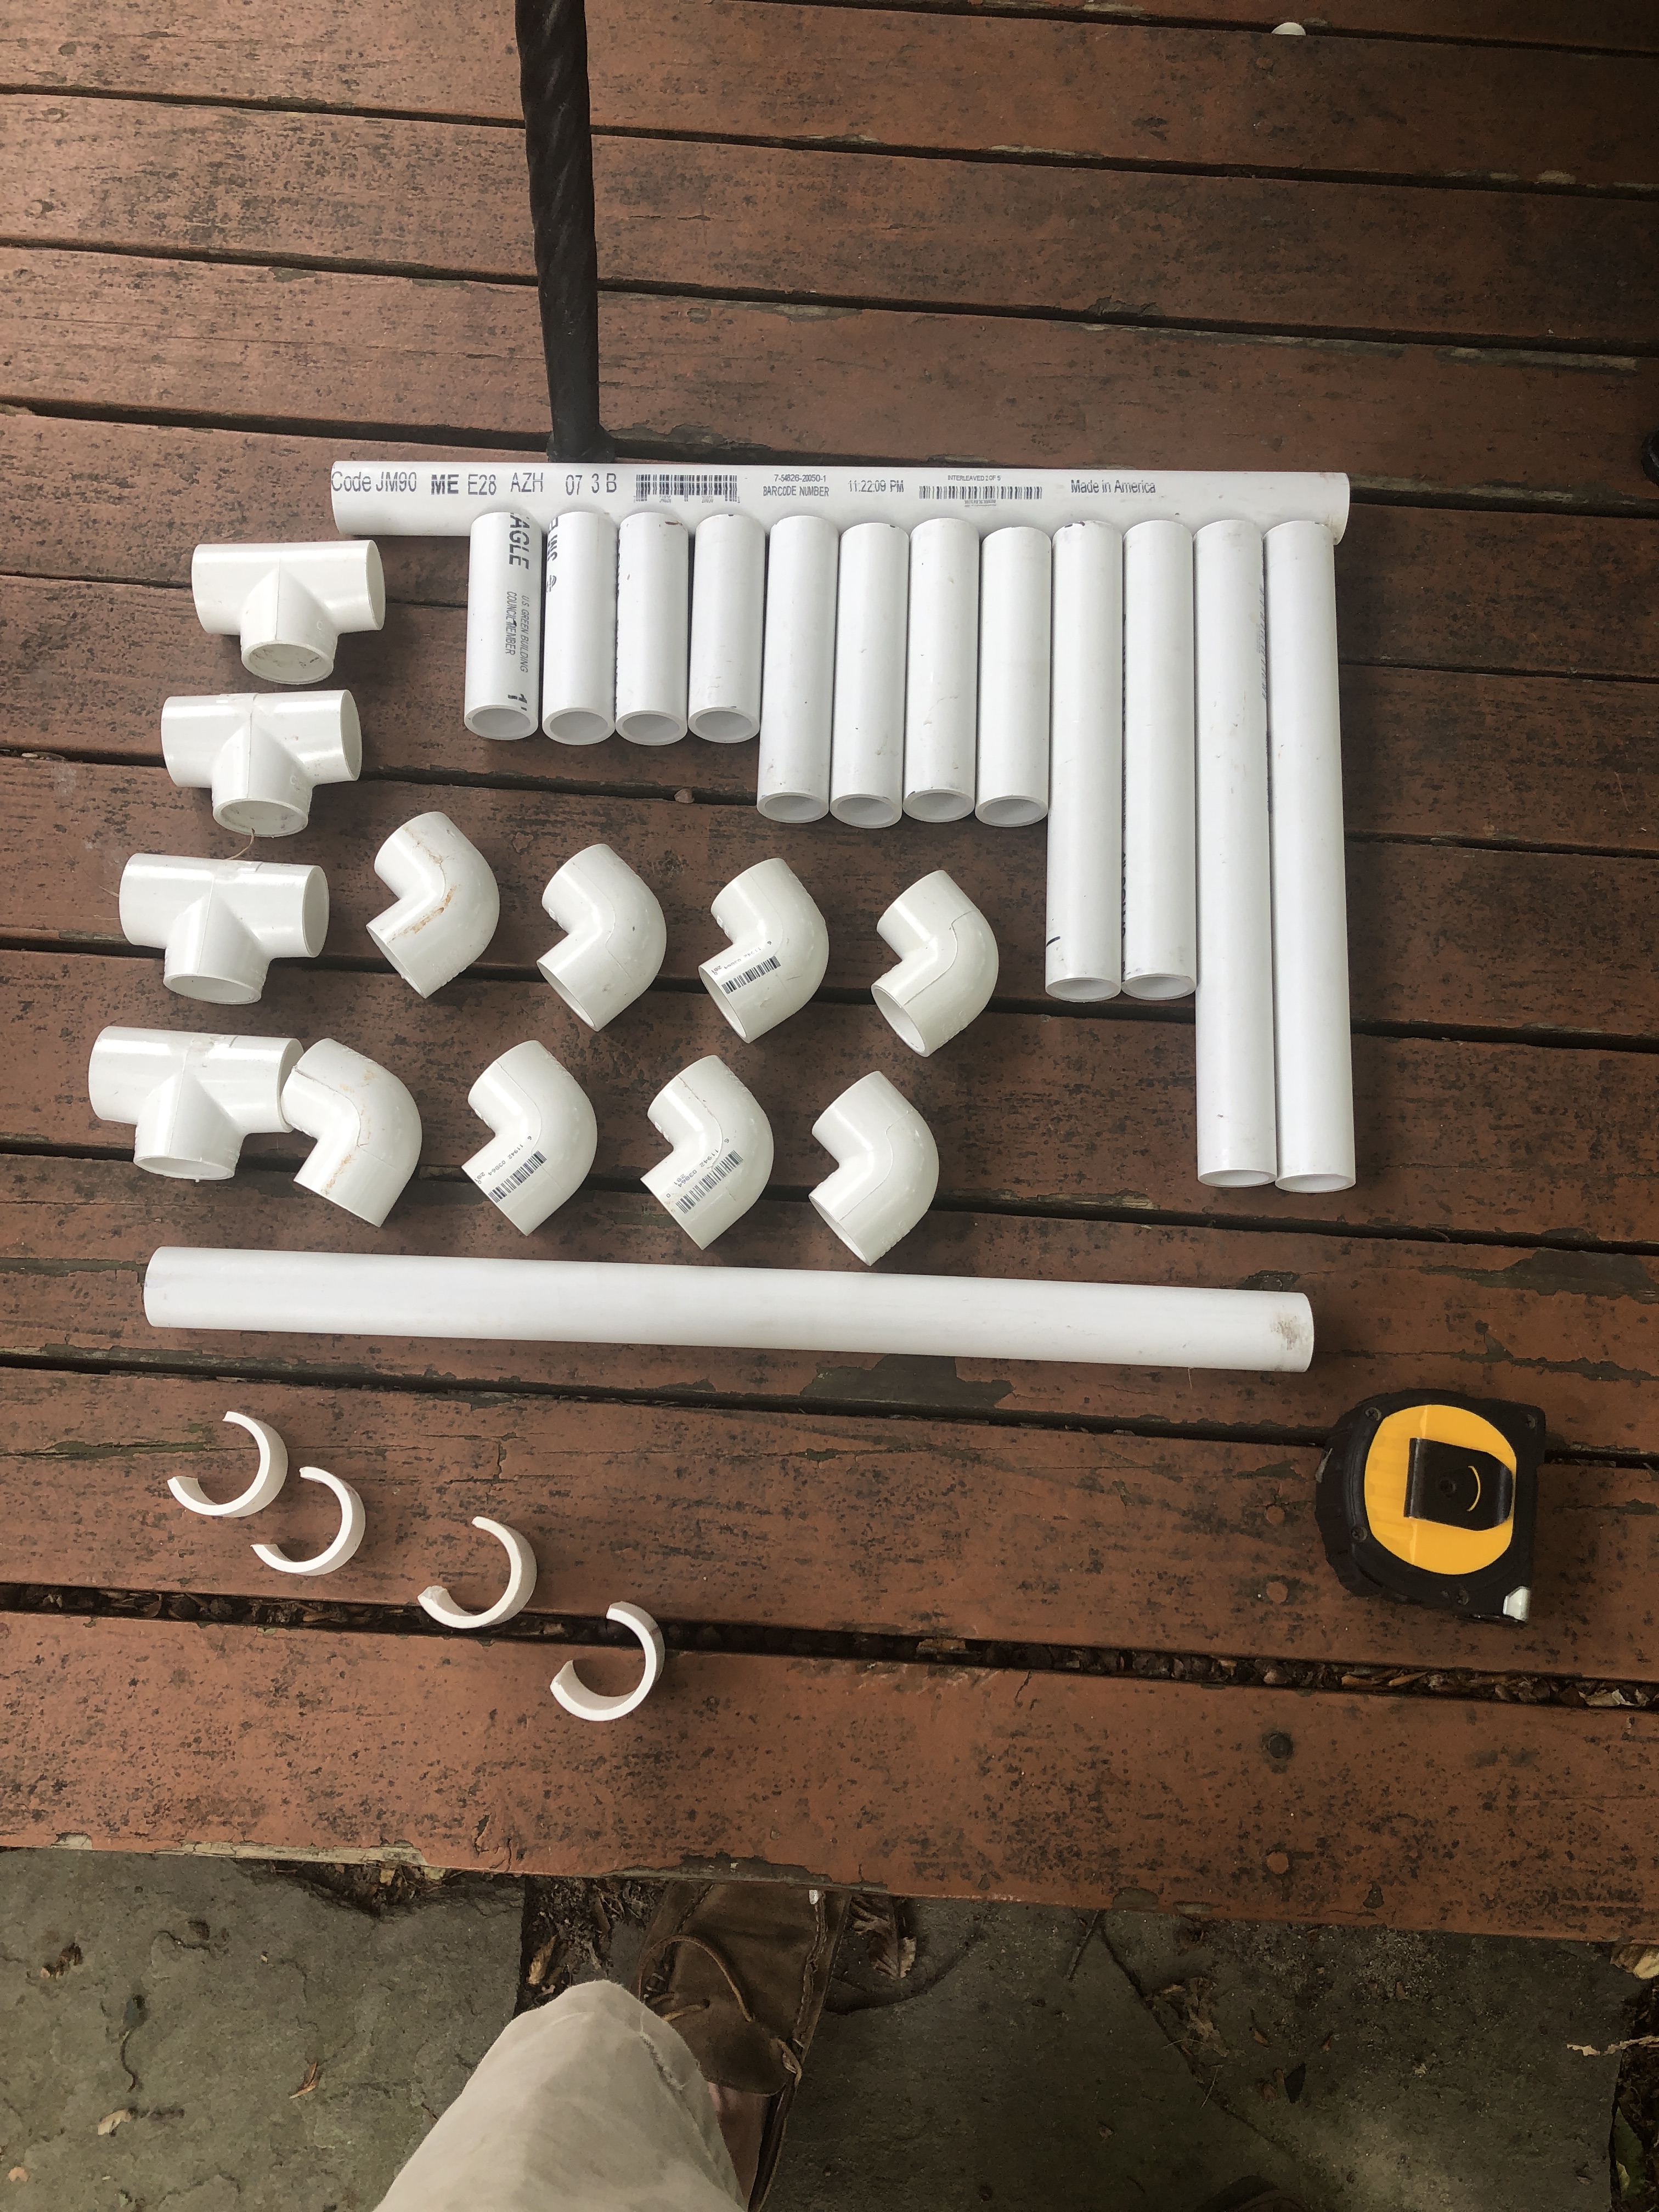
- 10 foot length of 1″ PVC schedule 40
- 8 1″ PVC elbows
- 4 1″ PVC tees
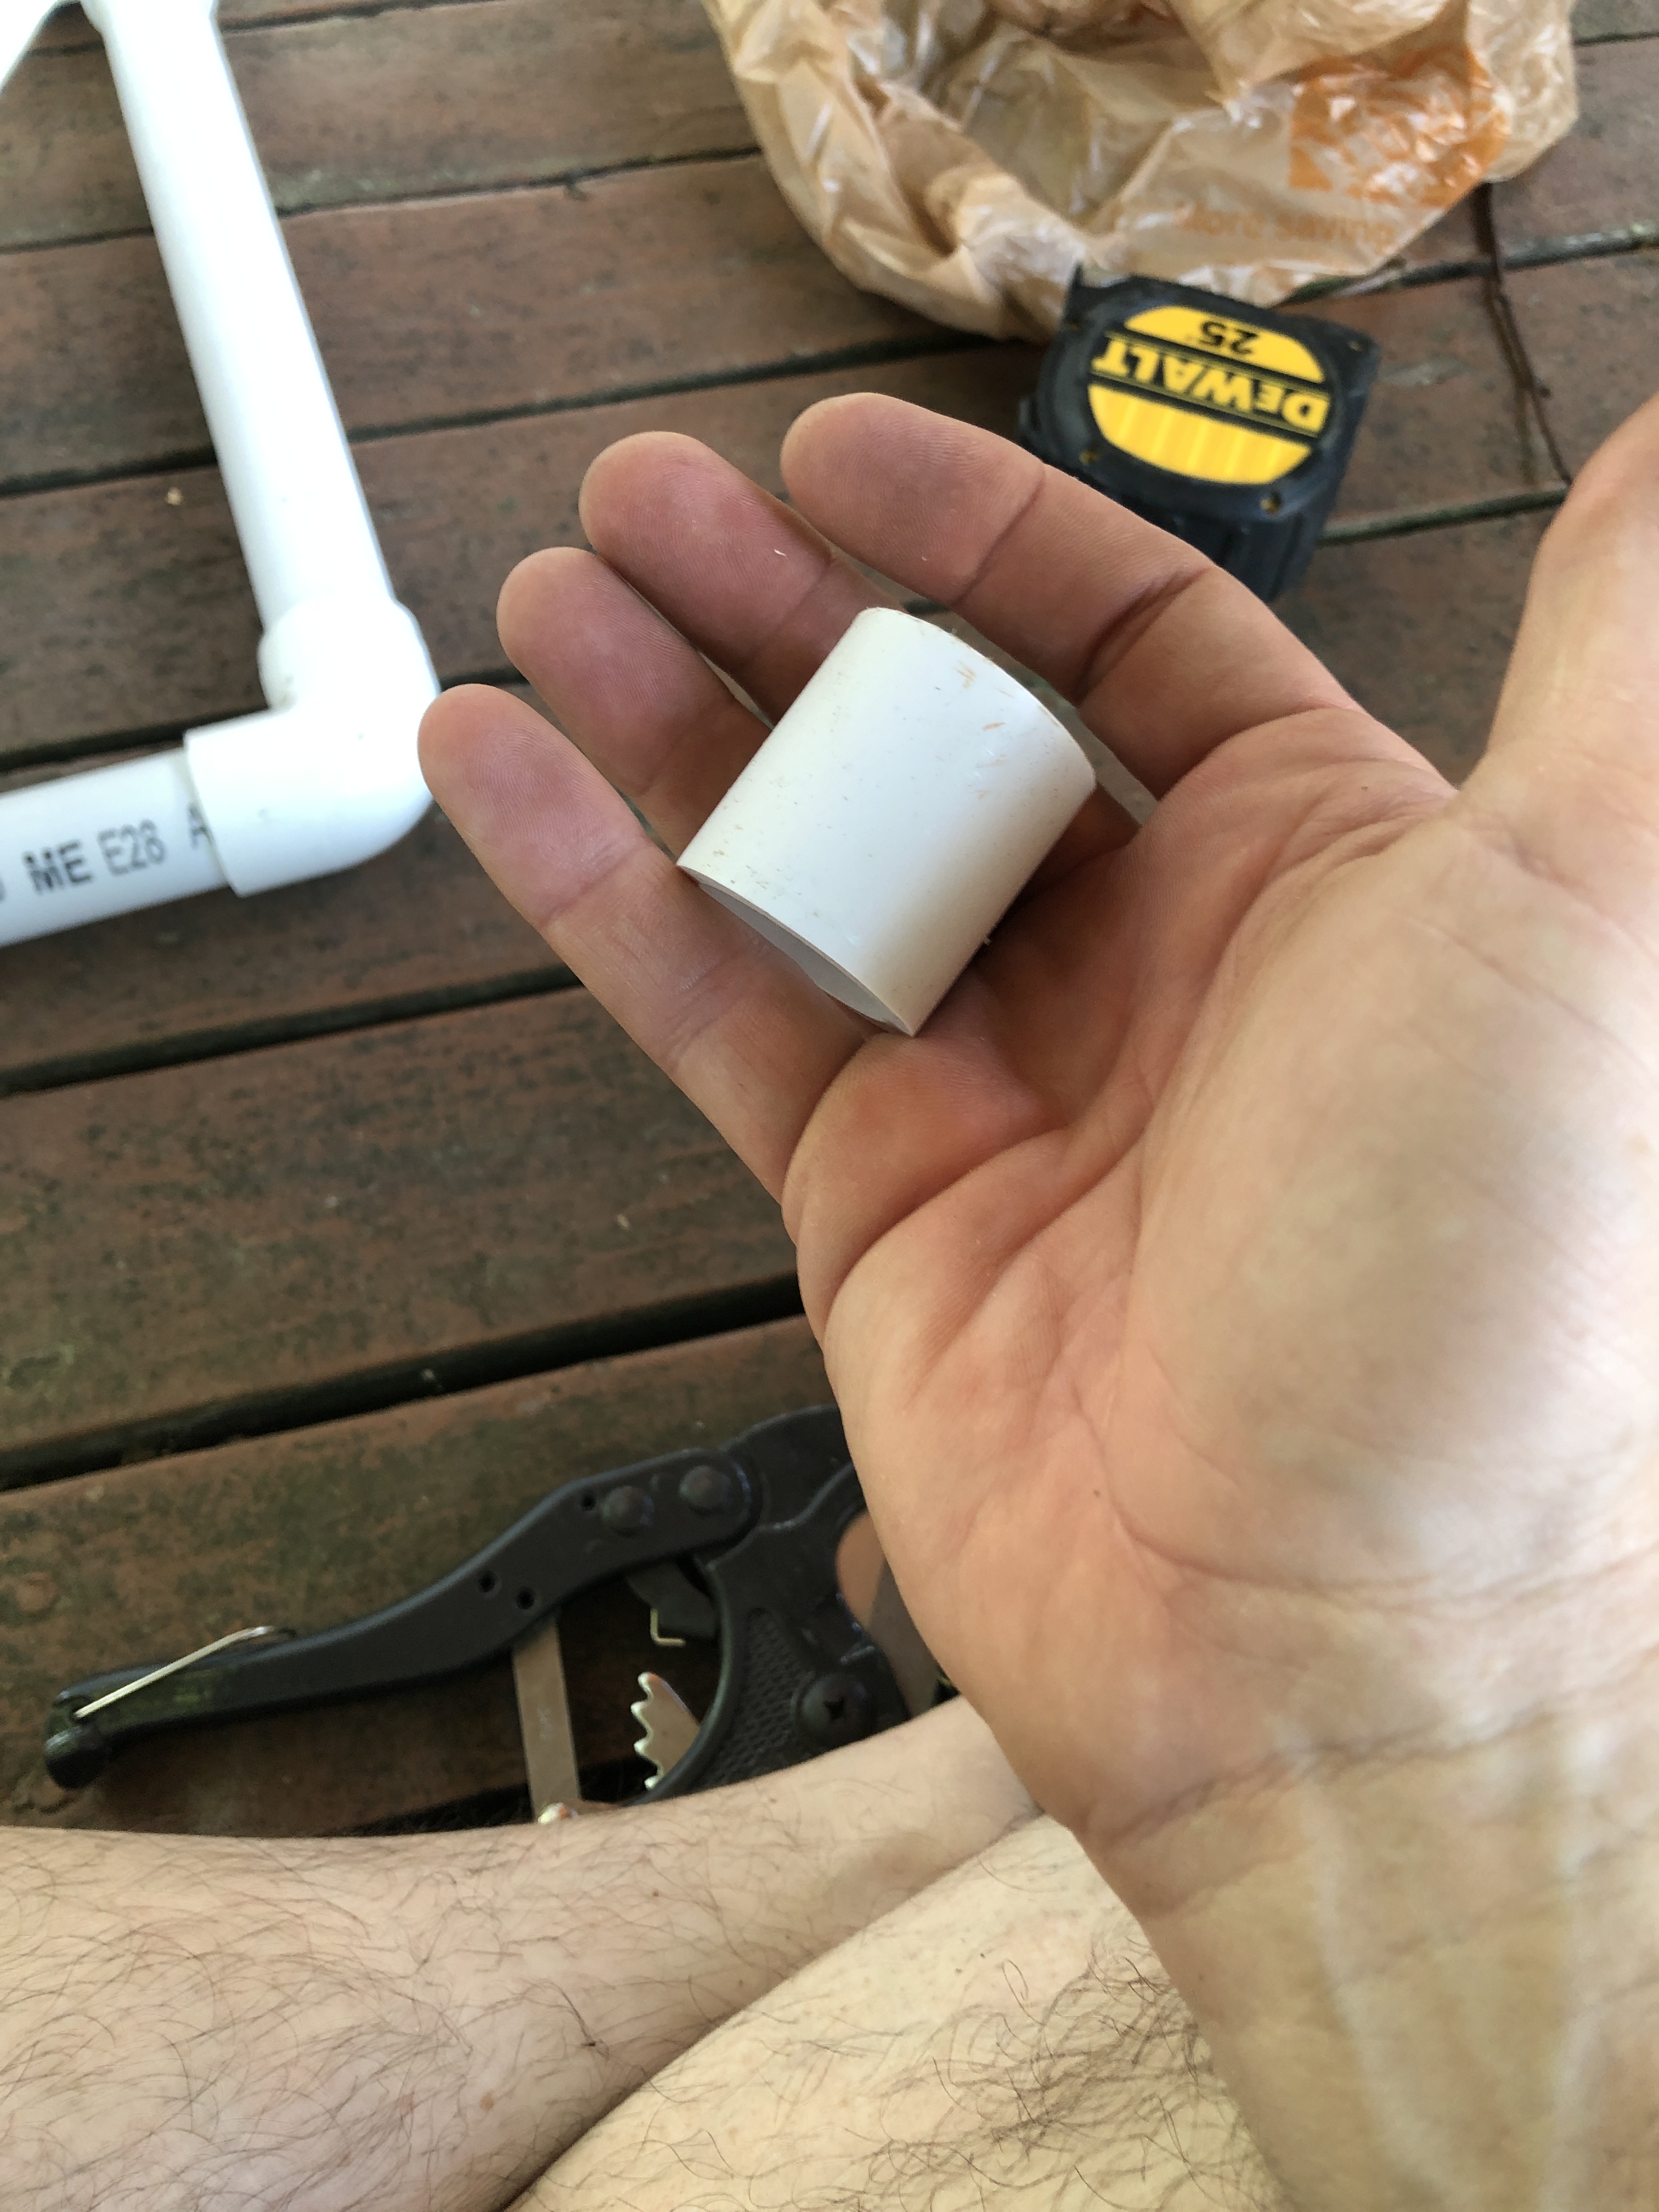
- 6″ of 1.25″ PVC (I had to buy a 2″ repair piece) *optional for bag clips*
- Plastic spray paint *optional*
- PVC primer and solvent *optional*
Cut List
- 2 @ 19″ (uprights)
- 2 @ 12.5″ (bottom hoop)
- 4 @ 5.5″ (bottom hoop)
- 2 @ 9″ (top hoop)
- 4 @ 4″ (top hoop)
Assembly
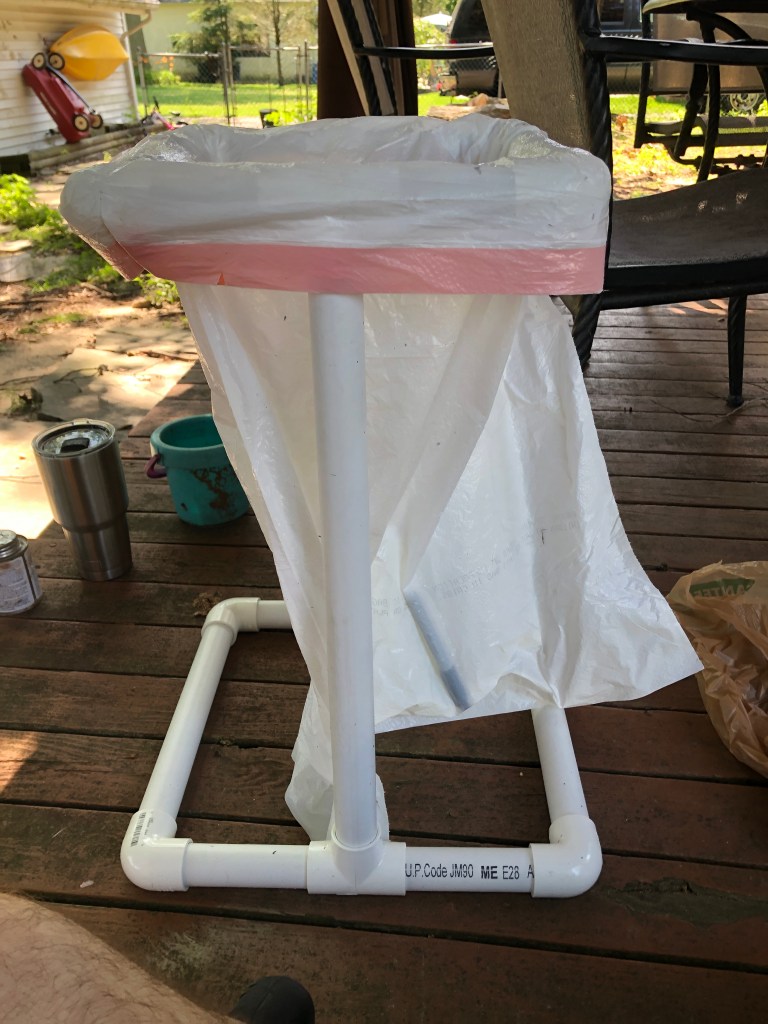
Assembly is pretty obvious. Build two rectangular hoops, each with a tee on two opposite sides. Put each hoop on a flat surface with the tee pointing roughly up in order to get your elbows flat. Because the top hoop is smaller than the bottom, the tee fittings will need to be at a slight angle. My goal was to have the top hoop fit inside the bottom hoop so when packed, it would only take the height of a single piece of PVC. The angle of the tee fittings messed this up for me though. That being said, since I didn’t glue them together, packing becomes even easier.
Once your hoops are flat, insert the legs into the bottom tee fittings. Adjust the angle of the legs until you can put the top hoop onto the legs. Take a step back and check the top hoop for level.
The clips are a bit tricky. Cut a 1 1/2 long piece of the 1 1/4 pipe. Using tin snips or another cutting tool you like, cut about 1/3 of the circumference of the piece out. The goal is to have a clip that you can spread open to clamp the trash bag to the PVC. If you don’t cut out enough of the pipe, you won’t be able to open it over the 1″ pipe. If you cut too much out, it won’t be an effective clamp.
I was originally planning to glue the hoops together and just fit the legs in each time I set this up. Once I assembled it, I realized that the friction in the fittings was enough to hold it together, so I used no primer / solvent. If you decide to glue yours, use a marker to draw a line across the joint from each fitting to the pipe that goes into it. The PVC solvent cures pretty quickly, without those guide lines, you will end up with twisted hoops that will never lay flat. That being said, if you do glue your hoops (especially the bottom one) you can add sand or water to the base for ballast. This might come in handy if you’re in a windy environment.
If you paint it, make sure you use a paint that is safe for plastic. If the paint is not compatible with plastic, it either won’t stick to the plastic & will peel off in sheets (best case) or will weaken & melt the PVC. I haven’t decided yet if this one is going to be painted.
Lid – I cut down a plywood scrap for a lid. Attached some small plywood blocks to the bottom to act as cleats to keep the lid centered over the top hoop. I screwed a cabinet door handle to the top to make it easier to open & close the lid. Hopefully, this lid will keep smells & insects down to a minimum.
Legal jibber-jabber
- As an Amazon Affiliate, I may earn commission if you purchase something linked from this page.
- Product reviews – unless stated otherwise, I have purchased all reviewed products with my own money.
- “Manufacturers claims” are exactly that. Their claims. If my text says “manufacturer claims” it means I haven’t checked it and I probably don’t have a way to check it. Hydrostatic ratings, R-values, Temperature ratings, etc.
- Follow these instructions at your own risk. I’m not a professional anything. I’m just some random human you encountered on the internet. I may or may not have any idea what I’m doing. I certainly have no idea what you’re doing. I accept no liability for injury, property damage or any other direct or indirect damages you may incur from anything on this page or any other pages I may or may not have authored.
- Copyright Reserved Creative Commons – Attribution, Non-Commercial, Share Alike . If I’ve inspired you, link back to this page. Don’t steal my text or photos. Feel free to modify my designs in any way you see fit. Don’t try to make yourself money from my ideas.
- Comments will be moderated. Those that add to the discussion will be allowed. Those that add nothing will be deleted. If you don’t agree with my decisions, get your own website.
- DON’T PANIC
