
I’ve gotten to the point where new projects don’t always* require purchasing** new tools. But as I work on more ambitious projects, I am building more tools & jigs.
When I built the drawer for the drill press cabinet, I was very dissatisfied with my results, so I started looking for something better.
Enter the box joint or finger joint jig.
It’s basically a smallish cross cut sled with a spacing pin. The pin ensures that the pins are the same size as the notches.
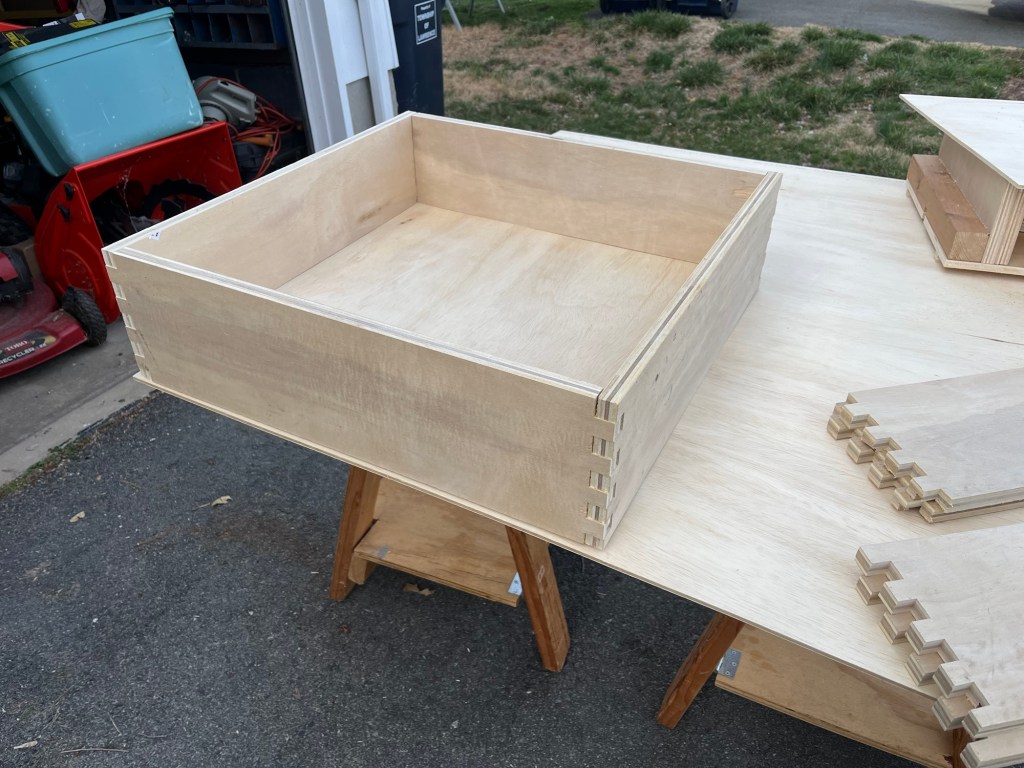
If your notches are the same depth as the thickness of your wood, you get a nice square joint with lots of area for glue.
Start by cutting out some runners for the miter slots on your saw.
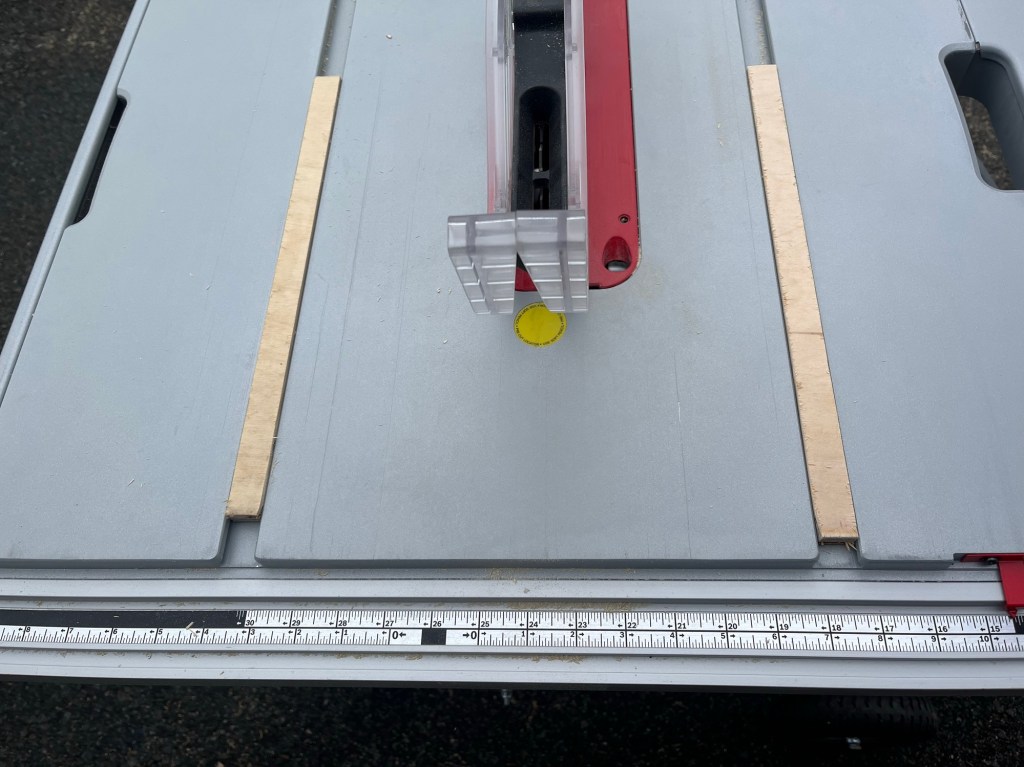
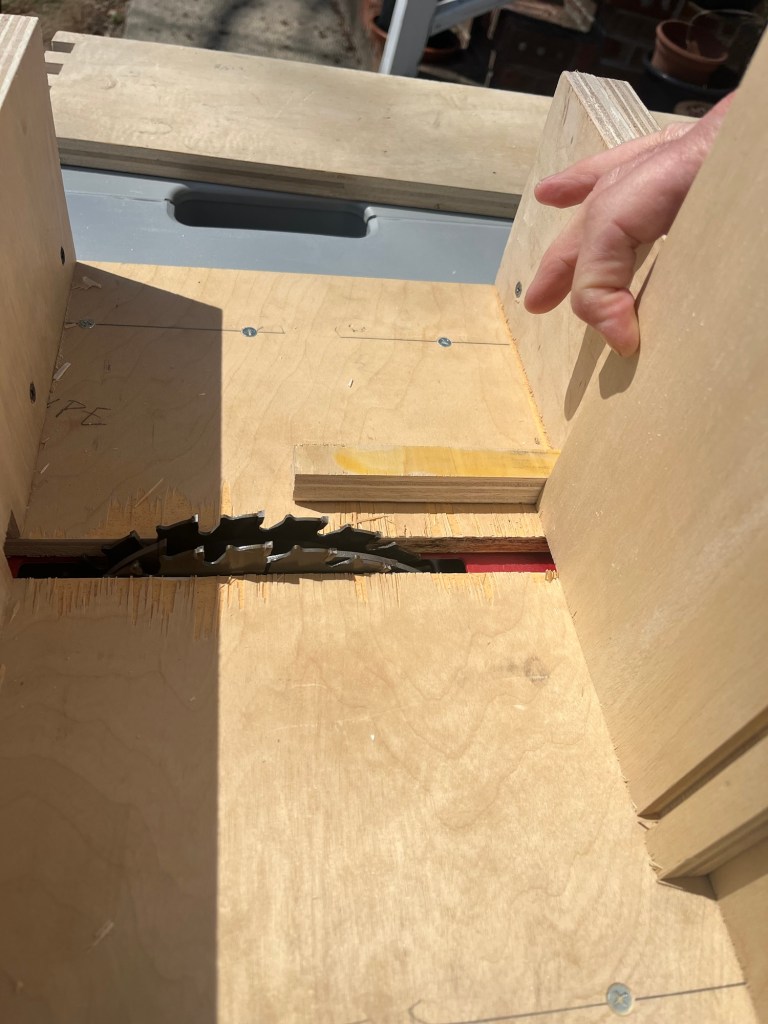
You’re going to need a deck for your jig – it has to be at least as wide as your miter slots and long enough for you to comfortably position your drawer parts without them coming into contact with the dado stack.
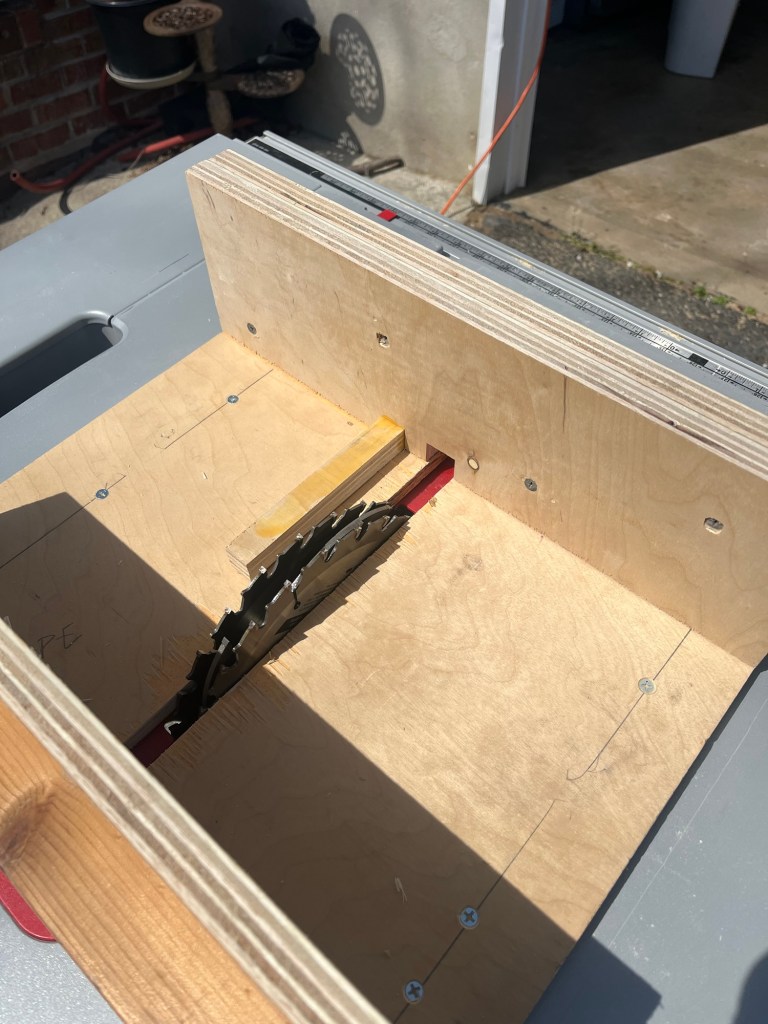
Through use, the bottom of the jig is going to be cut apart. The dado stack shouldn’t ever come higher than 3/4″ above the deck, so I need a beefy reinforcement higher than that. Enter this square stock that used to be part of an IKEA Ivar shelving unit.
Screwed into the square stock I have a front & rear plate. I cut three identical pieces 6” tall and as wide as my deck for the front & rear plates and the jig itself. The rear plate serves no real purpose other than to satisfy my desire for symmetry. My plates are about 6″ tall to keep my fingers away from the spinning bits of sharp metal, feel free to adjust that height to match your comfort levels.
I cut a 3/4″ wide strip of 3/4″ plywood to serve as my pin. If I was a real wood worker, I would have hand carved a piece of oak or maple with an interesting grain pattern, but here we are.
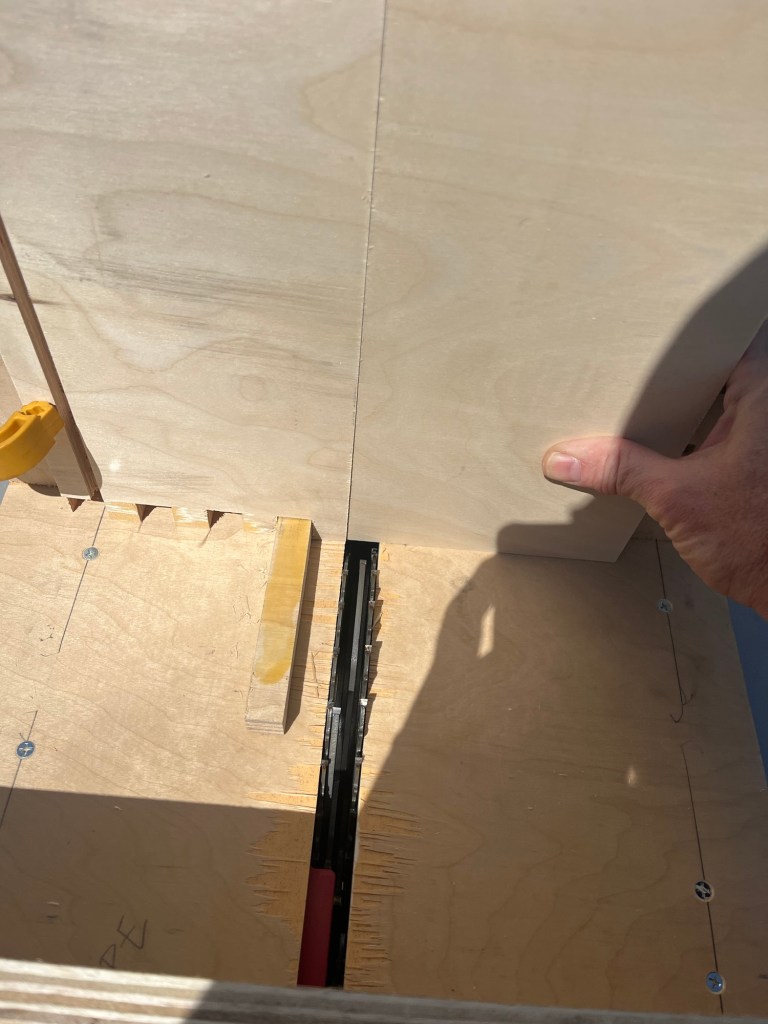
I cut a 3/4″ dado into the third piece of plywood and glued my pin into that dado. This pin & board assembly is the actual jig. For my first trials, I clamped the jig onto the sled & cut finger joints into scrap wood. I knew I was going to have to adjust the placement of the jig on the sled in order to have my pins & grooves match perfectly.
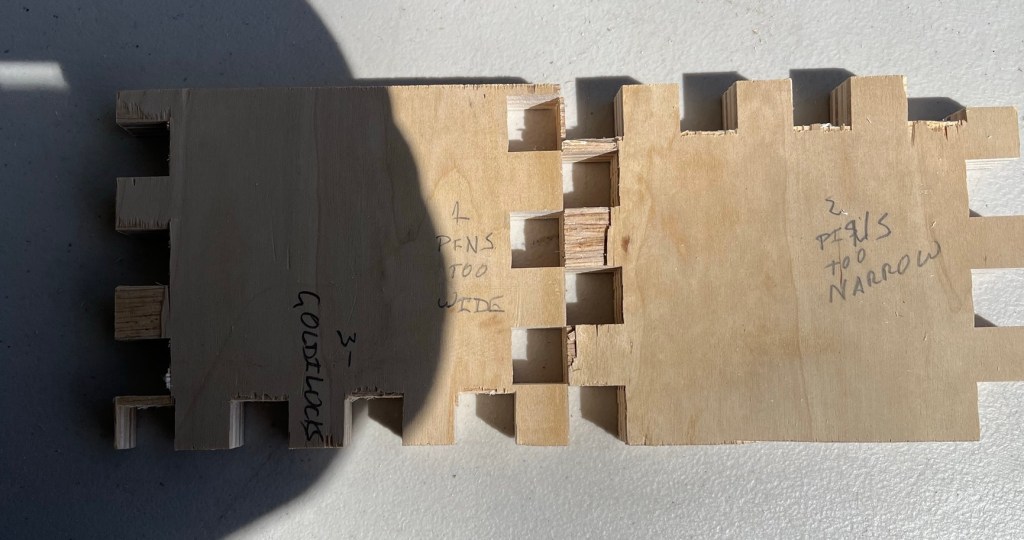
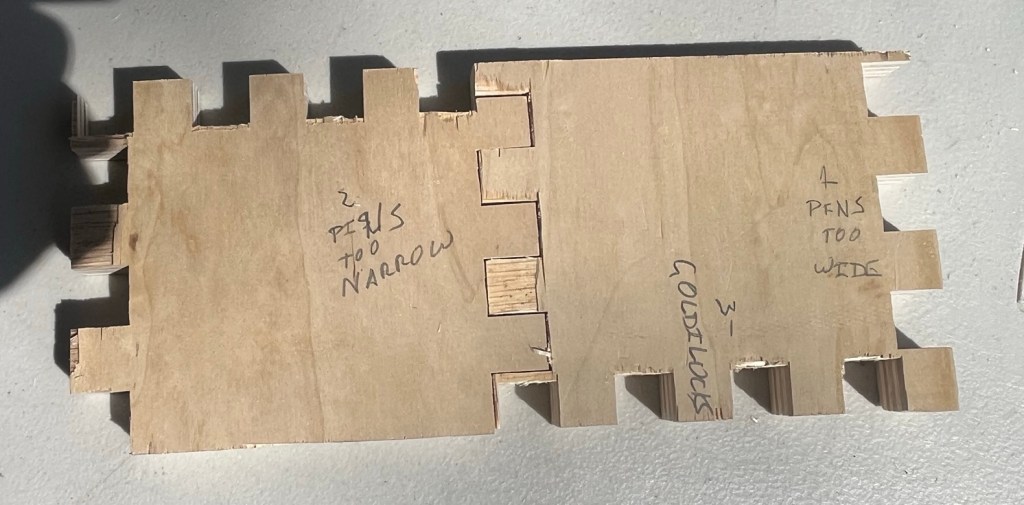
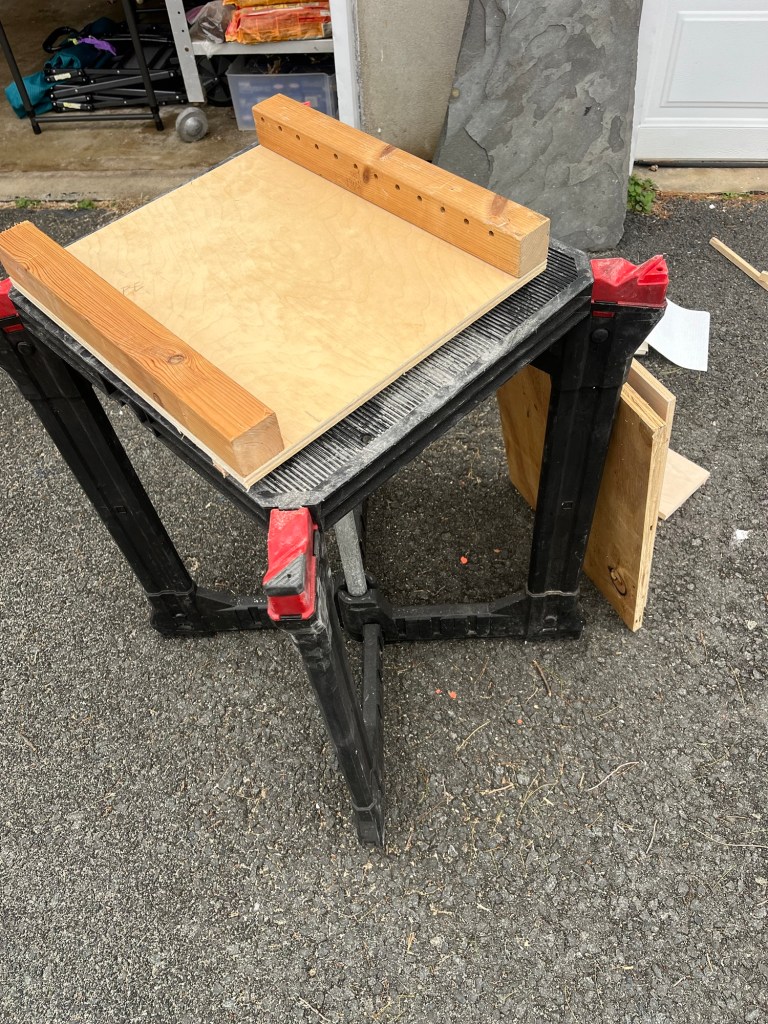
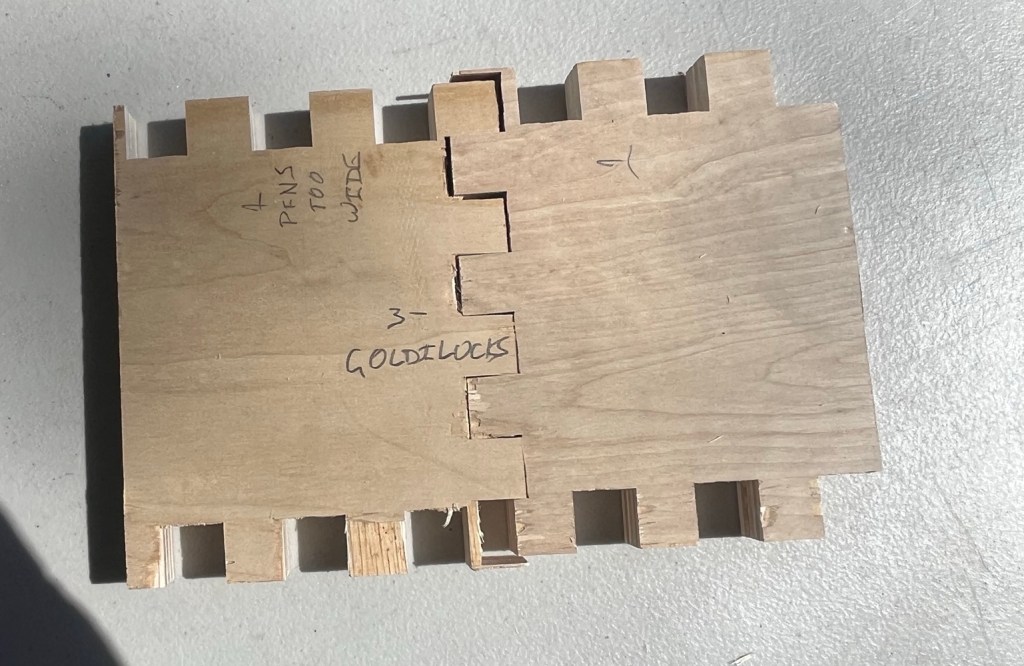
After three trials, I had the spacing I needed & screwed the jig onto the front plate.
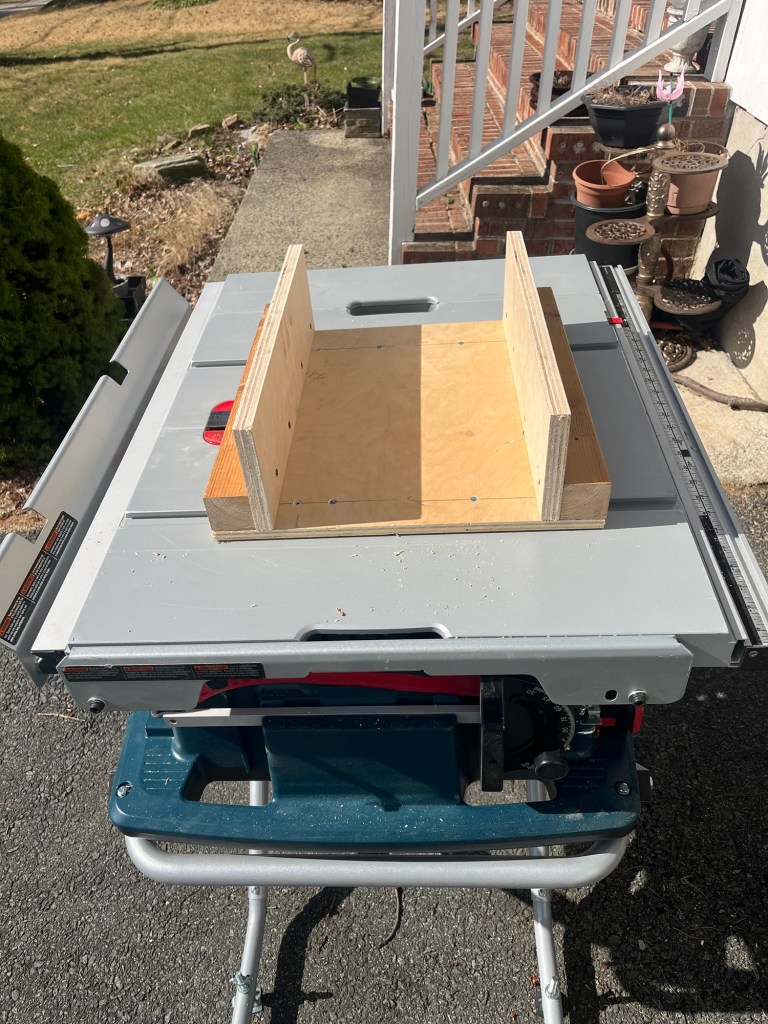
Cutting the joints for a drawer with this jig is astoundingly simple, if you remember to keep the drawer fronts & backs separated from the sides. The fronts and backs start with the top edge of the panel against the pin so you start with a pin. The sides have to be started with a notch so you turn a front around and lock it into the pin and then butt your side against the top edge.
This jig is fixed. It can only make 3/4″ finger joints in 3/4″ plywood. I can see that I’ll have to make a second version for 1/2″ ply or I’ll find a way to make a universal version. (There’s that iterative engineering again!)
*Dont tell my wife, but every time I want a new tool, I come up with a project that absolutely requires that new tool. This prevents me from owning tools I’ve never used and forces me to learn one new tool at a time.
**Joke’s on me this time. I seriously wasn’t going to purchase any new tools for this project. But then the magic smoke came out of my 30 year old circular saw. The new one has a laser above the blade. It reminds me a a shark with a frickin’ laser-beam attached to its head.

One thought on “Box joint jig for the table saw”